How to set up an IMAP email account
See also:
Accessing your Gmail account with IMAP
What is an email account?
IMAP (Internet Message Access Protocol) is the most widely used protocol for accessing and managing emails on a remote mail server. Unlike POP, which typically downloads and removes emails from the server, IMAP keeps your emails stored on the server and synchronizes them across devices. This makes it the preferred choice for most users and email providers. Email Parser fully supports IMAP, allowing it to connect to your mailbox and automatically process incoming emails as they arrive.
Adding a new email account
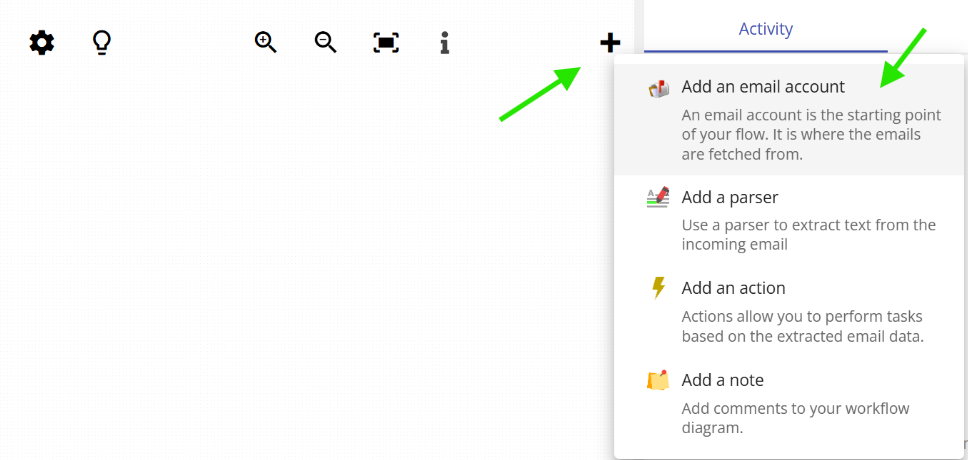
To add a new email account in Email Parser, click on the plus symbol in the workflow diagram and choose “Add email account” from the menu that appears:
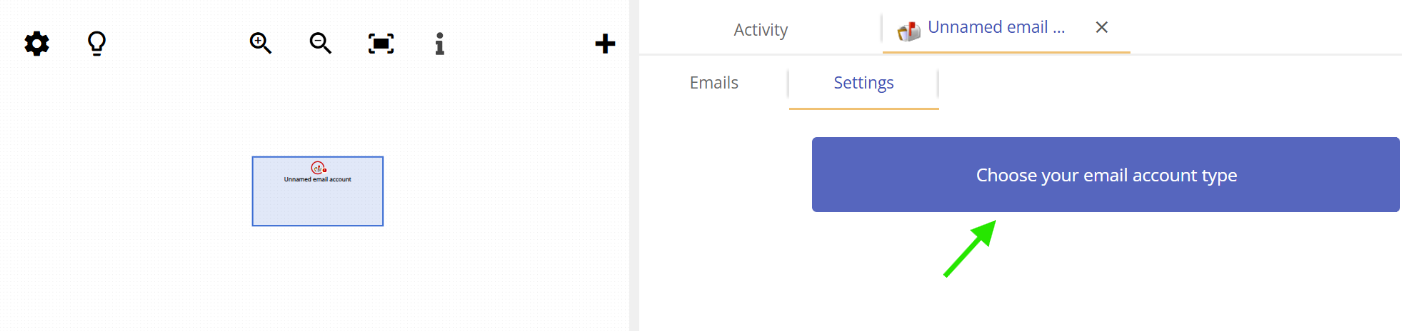
Once you click “Add email account”, Email Parser will prompt you to select the type of account you want to add. Click on the account type selector to open the list of supported account types:
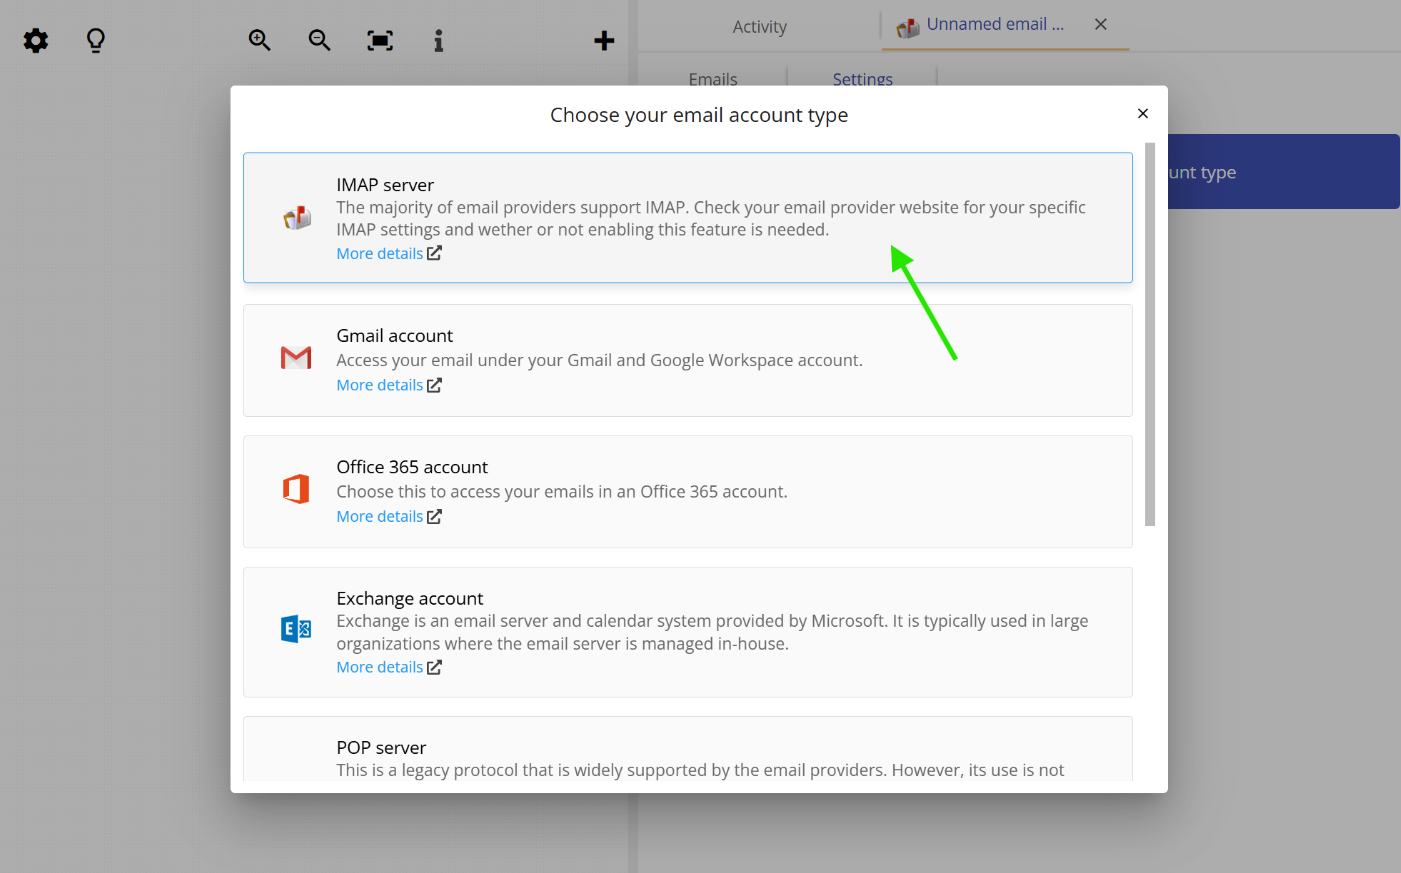
Selecting IMAP as the account type
A dropdown menu will appear listing all the email account types that Email Parser supports. Select “IMAP” from the list to set up an IMAP email account:
Entering the IMAP connection parameters
After selecting IMAP, a form will appear asking for the connection details of your mail server. Fill in all the required fields with the information provided by your email service provider. Most providers include this information in their help pages or documentation:
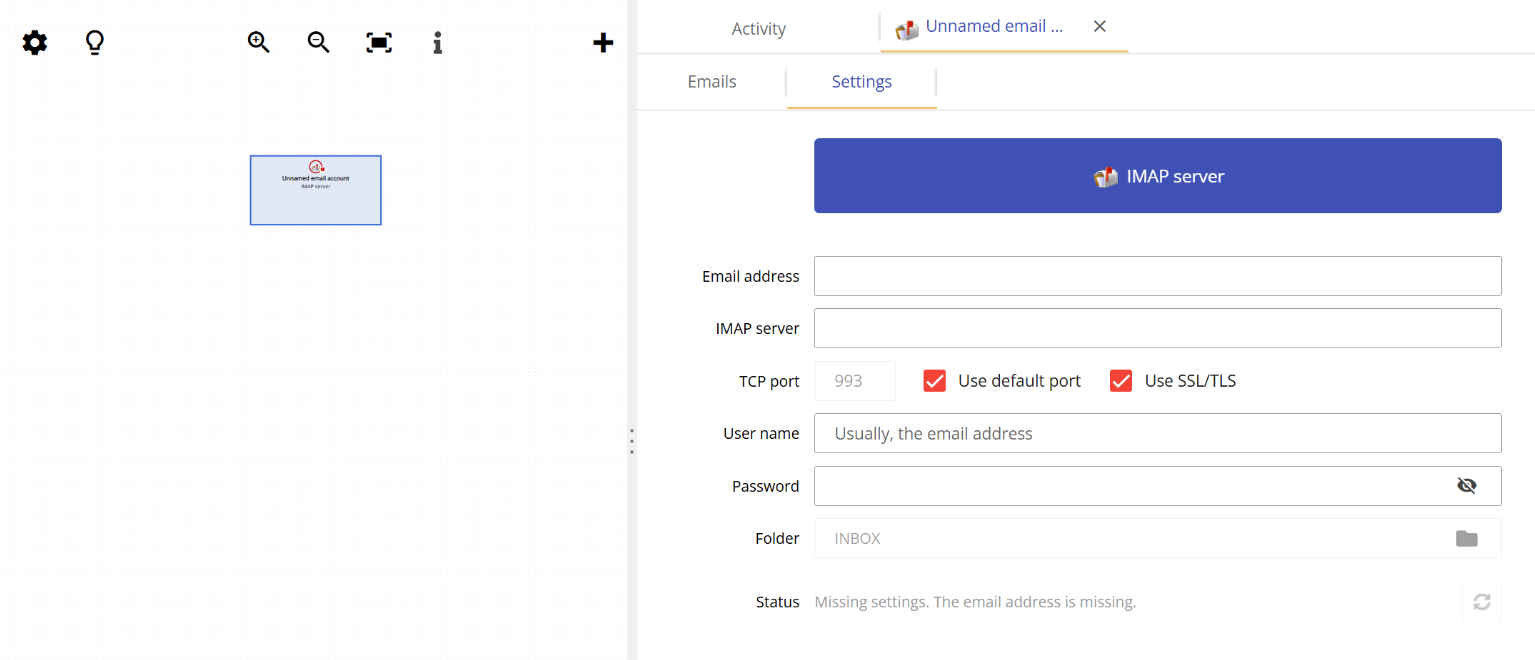
The typical parameters you will need to provide include the IMAP server hostname (for example, imap.gmail.com for Gmail), the port number (commonly 993 for SSL/TLS), your email address, and your password or app-specific password. Once you have entered all the details correctly and saved the configuration, Email Parser will connect to your mailbox and display the status “Connected. Waiting for new emails” in the status box, indicating that everything is set up correctly and the application is ready to process incoming messages.