Running an AWS Lambda function
See also:
Overview of scripting in Email Parser
Email Parser can invoke Amazon Web Services (AWS) Lambda functions as part of the email parsing process. This means that when an email arrives and Email Parser processes it, one of the steps in your workflow can be a call to a Lambda function running on AWS. The Lambda function receives the fields that have been extracted from the email (or generated by previous steps) and can also produce new fields that later steps in the workflow can use.
Adding an AWS Lambda action to your workflow
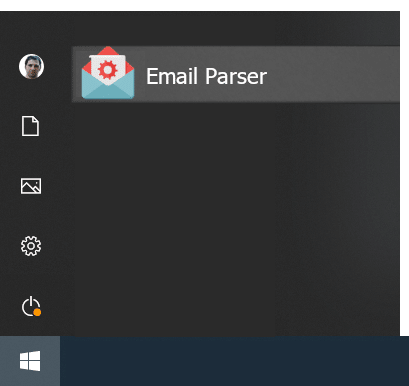
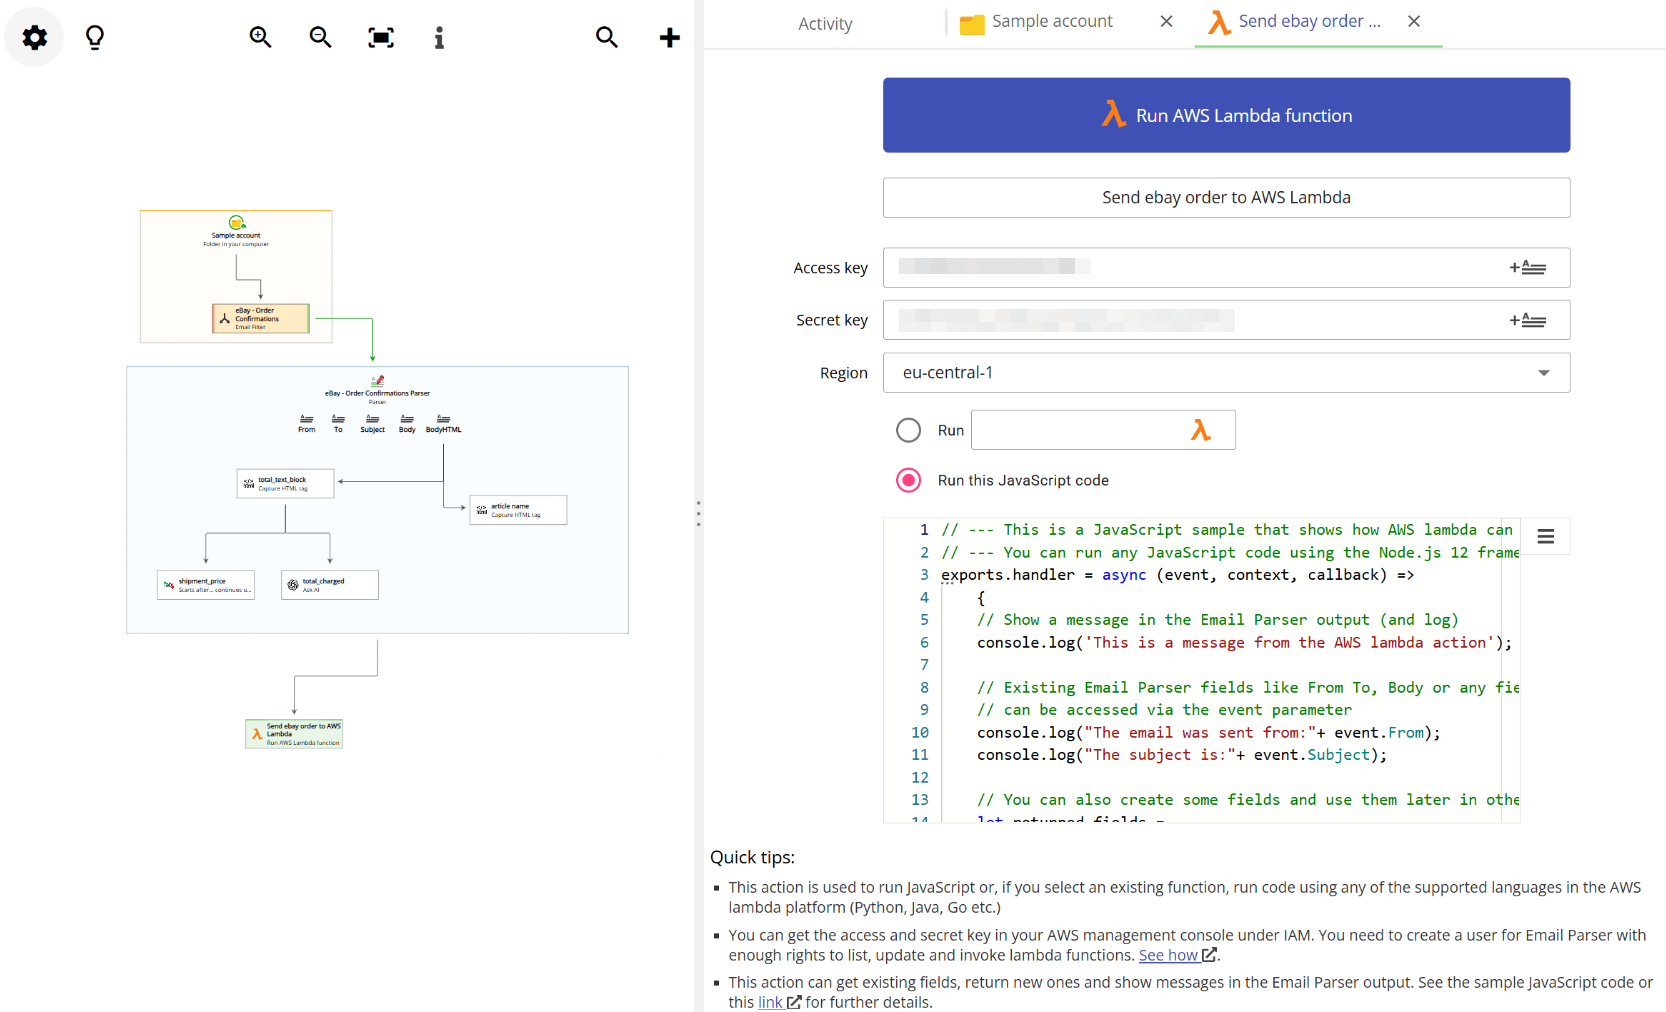
To invoke an AWS Lambda function, you need to create a new action in the workflow diagram. Right-click on the workflow diagram (displayed on the left side of the application) and choose Run AWS Lambda function from the list of available action types:

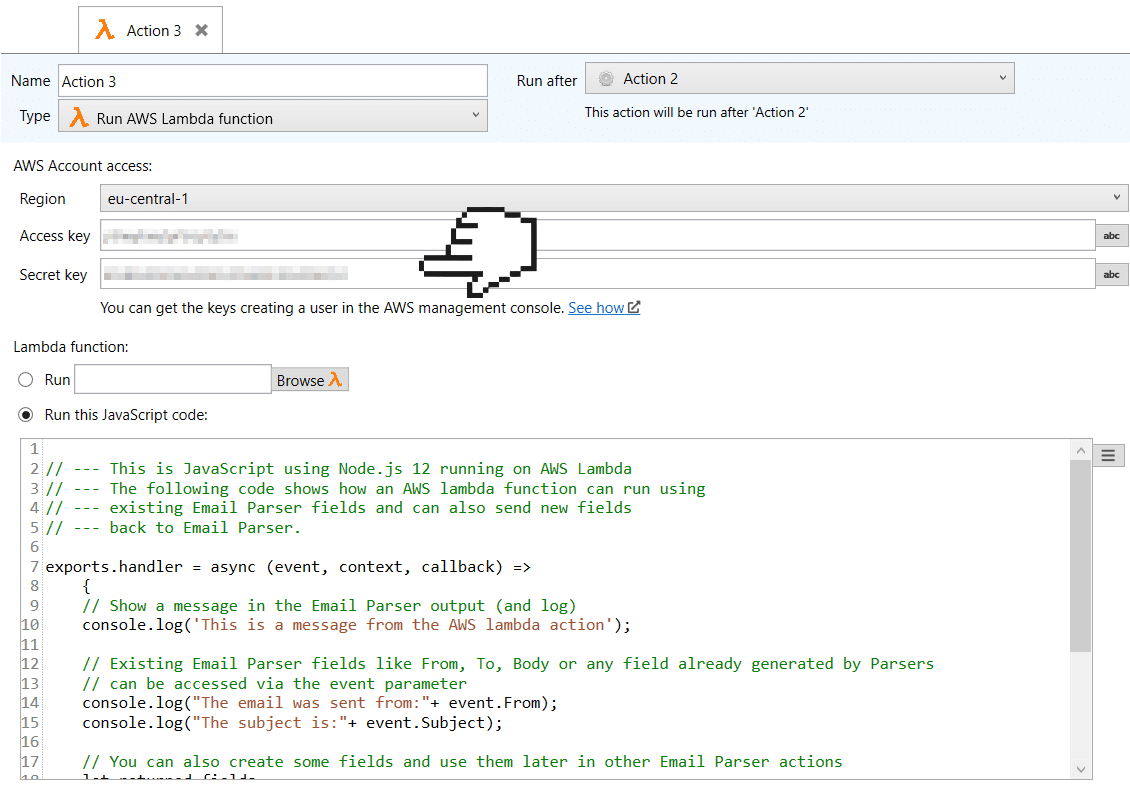
Once the action is created, you will see the settings panel where you can configure the AWS credentials (access key and secret key) and select the AWS region. You have two options for running your code:
- Invoke an existing Lambda function: select one of the Lambda functions already deployed in your AWS account.
- Enter the code directly in Email Parser: write your Node.js version 20 code right in the settings panel. Email Parser will deploy it to AWS Lambda for you automatically.
The following screenshot shows the settings panel with the code entered directly:
How fields flow through the workflow
When an email arrives, Email Parser executes the steps in the workflow diagram one by one, from top to bottom. Each step can read fields that already exist and, in some cases, create new ones. These fields come from different sources:
- Email fields, such as
From,To,Subject,Body, and others that are automatically available for every email. - Fields captured by parsers: any data your parser actions have extracted from the email body or subject (for example,
street_address,order_number, orcustomer_name). - Fields generated by previous actions: for example, the output of a previous HTTP Request action or another Lambda function.
An AWS Lambda action can read all of these fields and also produce new ones. The new fields become available for any subsequent step in the workflow.
Reading existing fields in your Lambda function
Inside your Lambda function, the existing Email Parser fields are passed through the event parameter. Each field is a property of this object, so you can access them directly by name. For example, the following code reads the From and Subject fields:
{
    // Existing Email Parser fields like From, To, Body or any field
    // already generated by parsers can be accessed via the event parameter
    console.log("The email was sent from: " + event.From);
    console.log("The subject is: " + event.Subject);

    callback(null, null);
    return(context.logStreamName);
    };
You can access any field that exists at that point in the workflow. For instance, if a previous parser step captured a field called order_id, you can read it as event.order_id.
Creating new fields from your Lambda function
Your Lambda function can also create new fields that Email Parser will use in subsequent steps of the workflow. To do this, call the callback() method with an object whose properties are the fields you want to return. Each property name becomes a new field name, and the property value becomes the field value:
{
    // You can create fields and use them later in other Email Parser actions
    let returned_fields =
        {
            name: "John Dow",
            order_id: "1234567890",
            timestamp: ["202004021635", "202004021637", "202004021638"]
        };

    callback(null, returned_fields);
    return(context.logStreamName);
    };
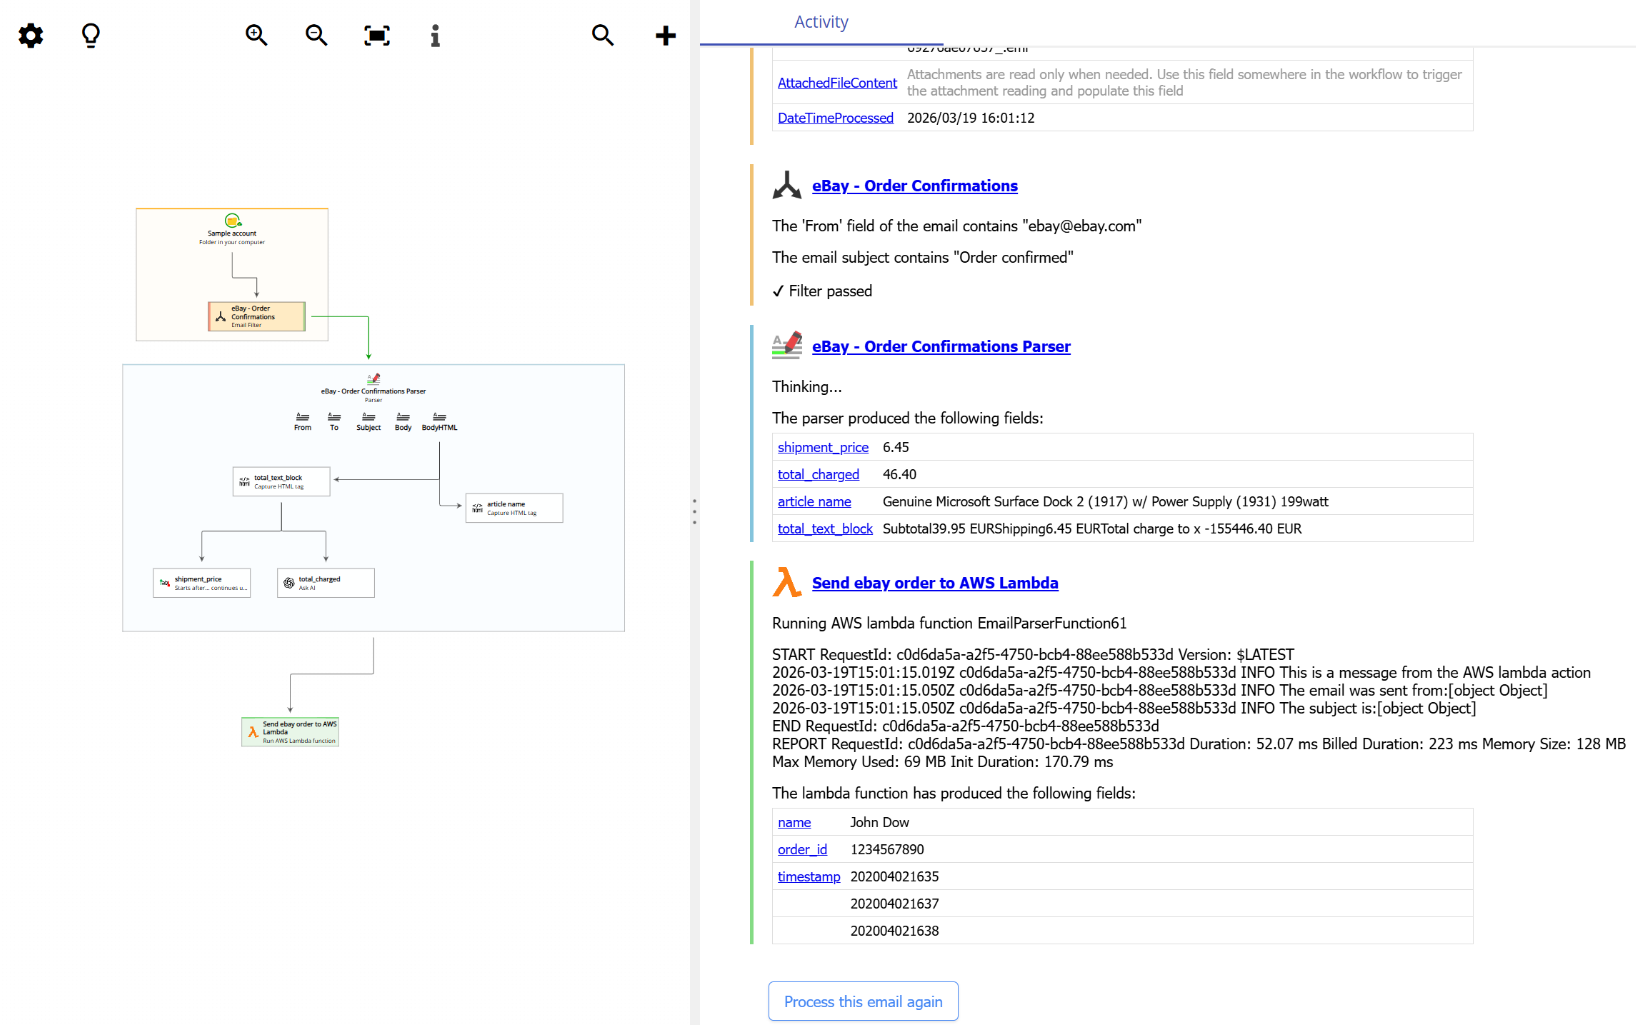
In this example, the Lambda function creates three new fields: name, order_id, and timestamp. After the Lambda action runs, these fields are available to any action that comes after it in the workflow. You can reference them using field placeholders just like any other field.
The following screenshot shows the activity log after processing an email with an AWS Lambda action that reads email data and generates new fields:
How to configure your Amazon Web Services account to work with Email Parser
Email Parser needs an AWS access key and a secret key to invoke Lambda functions in your AWS account. To set this up, you need to create a specific IAM role and IAM user in your AWS account. Follow these steps:
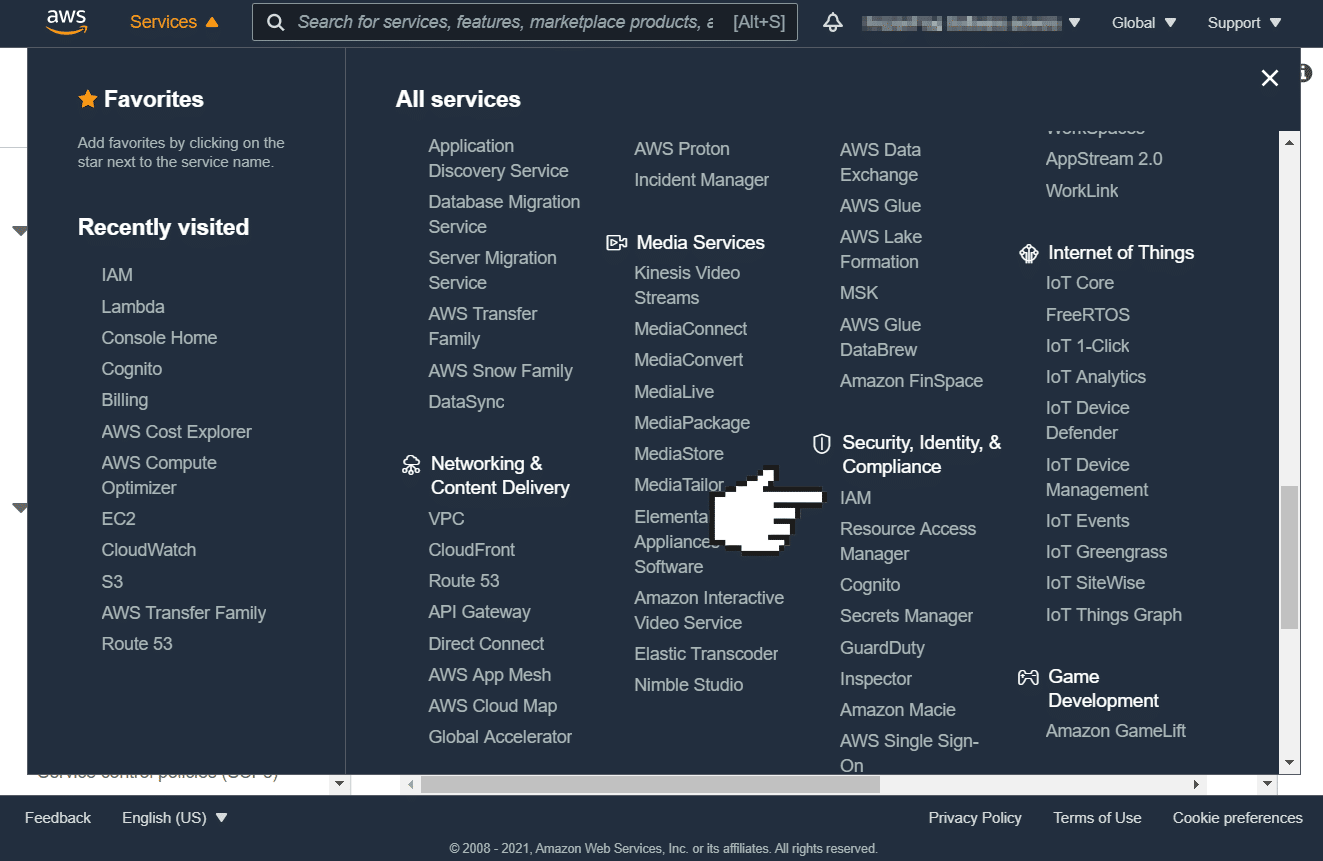
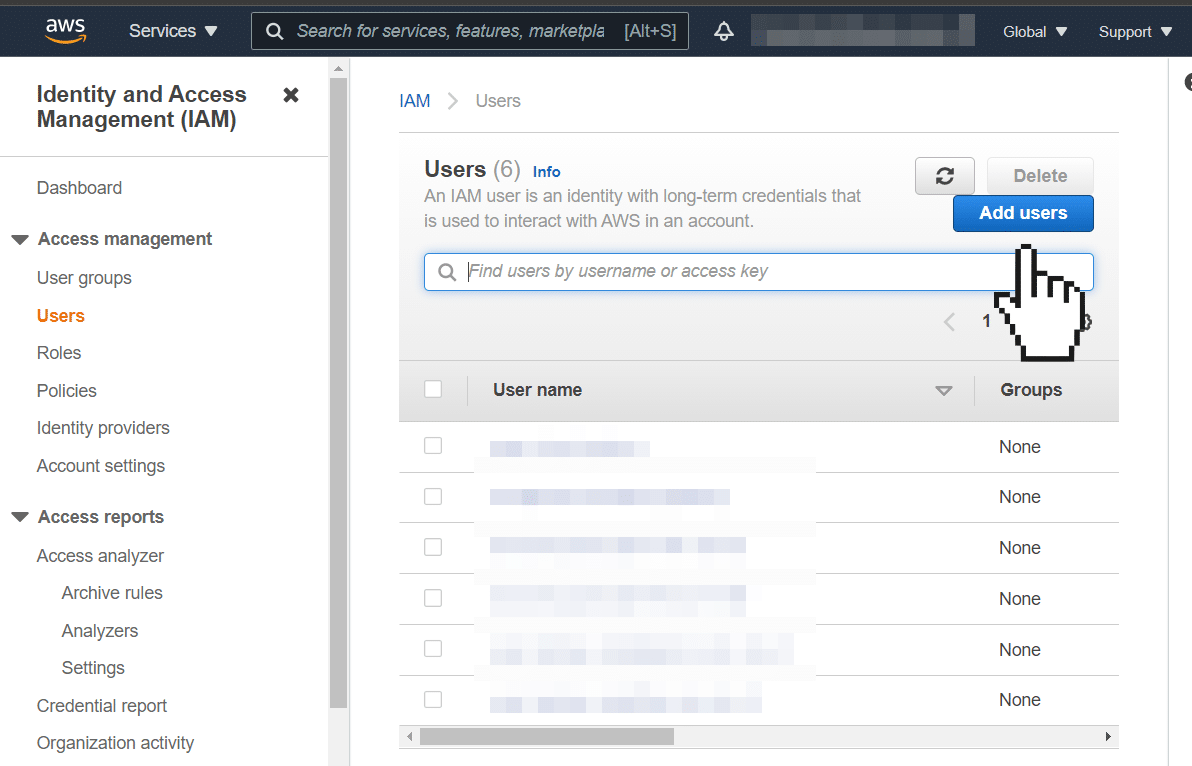
Step 1: Open IAM in your AWS account
Log in to your Amazon Web Services account and navigate to the IAM (Identity and Access Management) service:
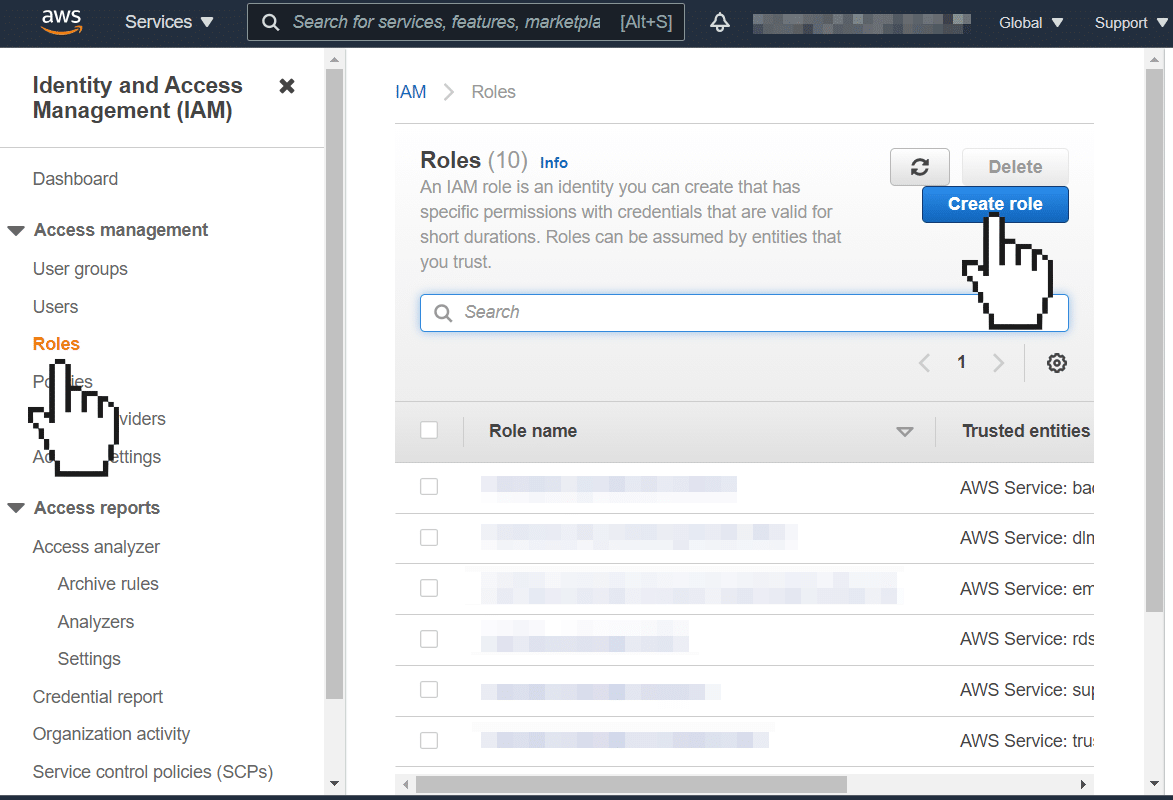
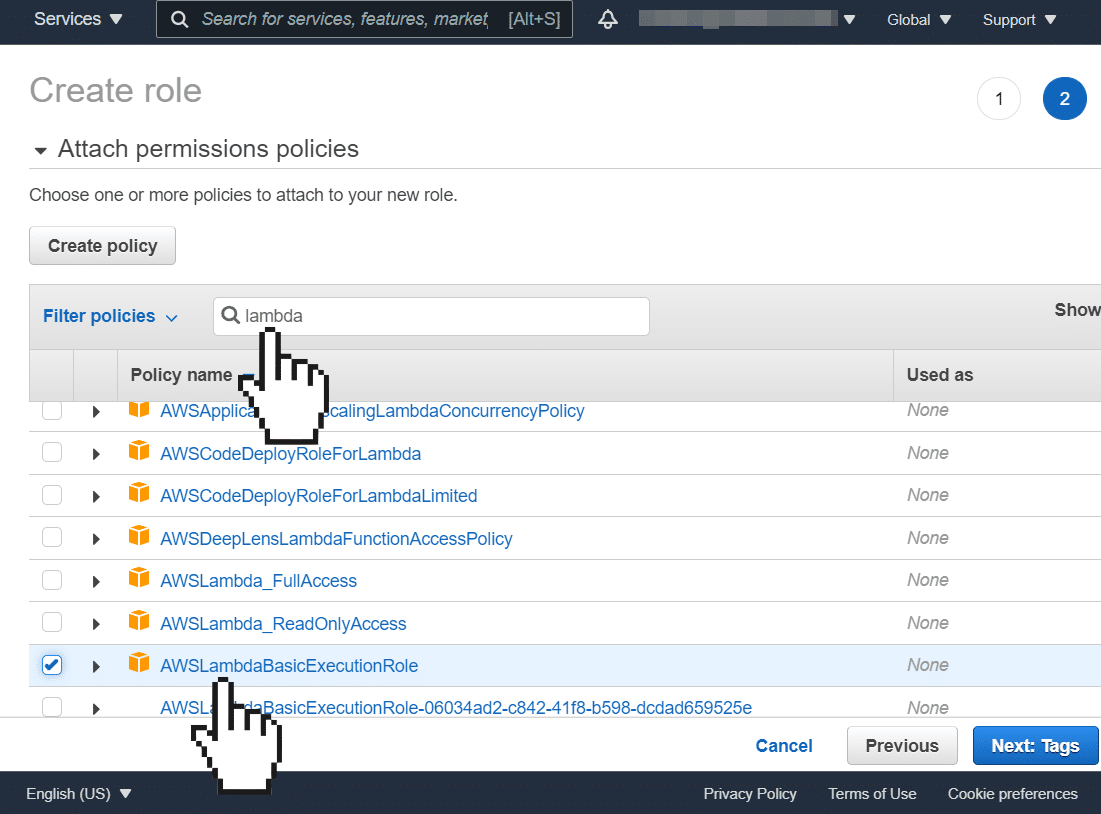
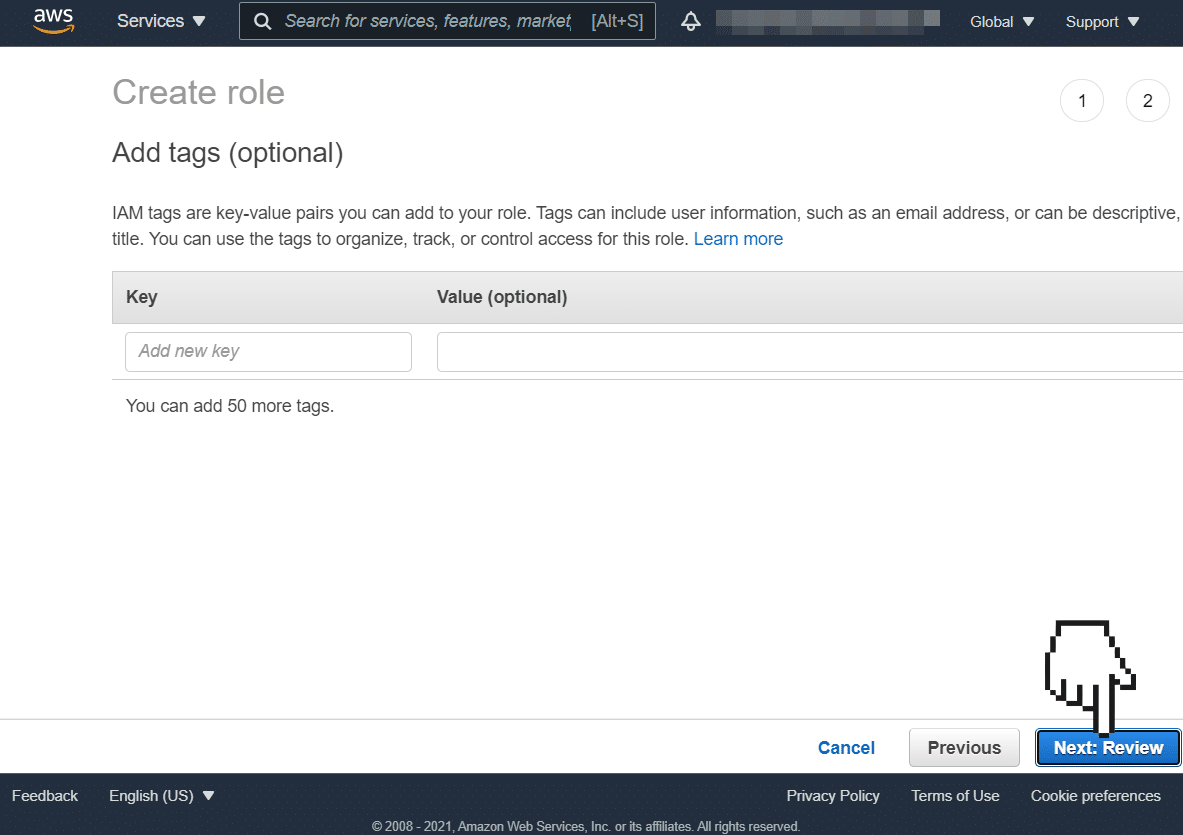
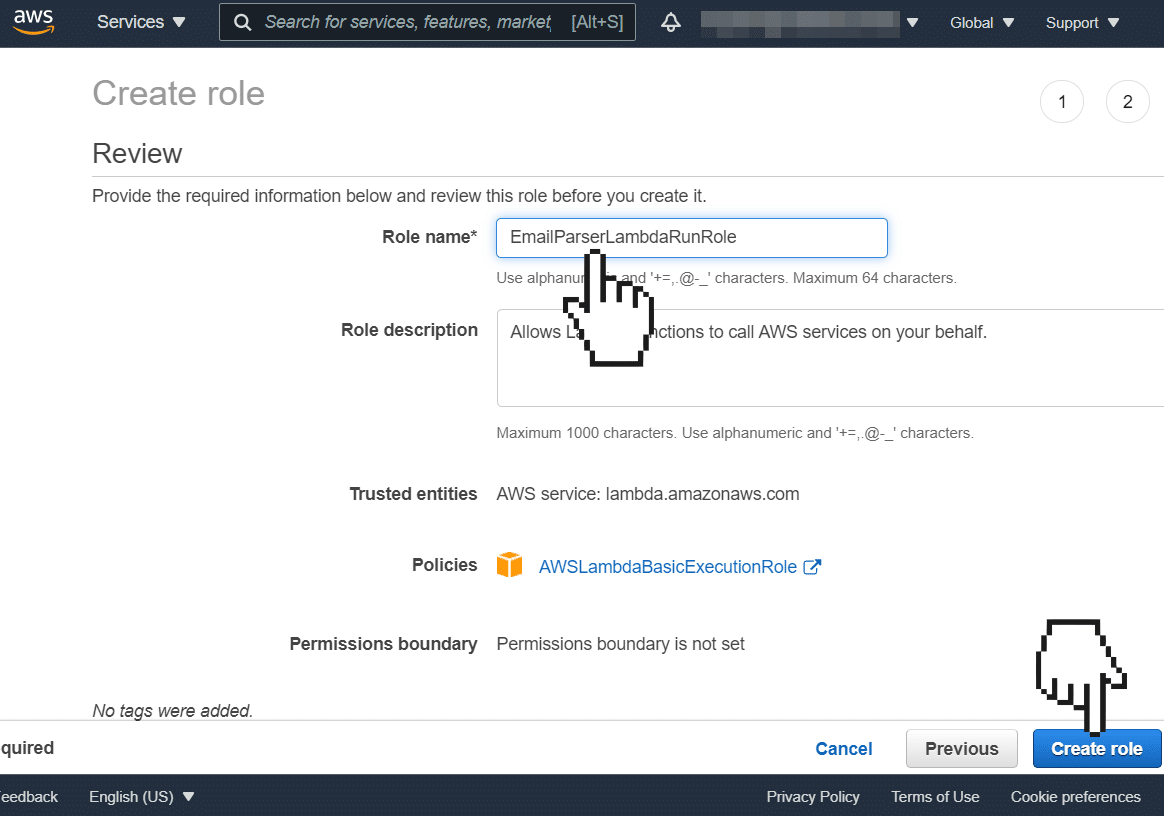
Step 2: Create the Lambda execution role
Create a new role named EmailParserLambdaRunRole. This role defines the permissions under which your Lambda function will run. It is very important that the role is created with this exact name, as Email Parser looks for it when deploying and invoking Lambda functions. In most cases, you will attach the AWSLambdaBasicExecutionRole policy to this role, but you can attach a different policy if your function needs additional permissions.

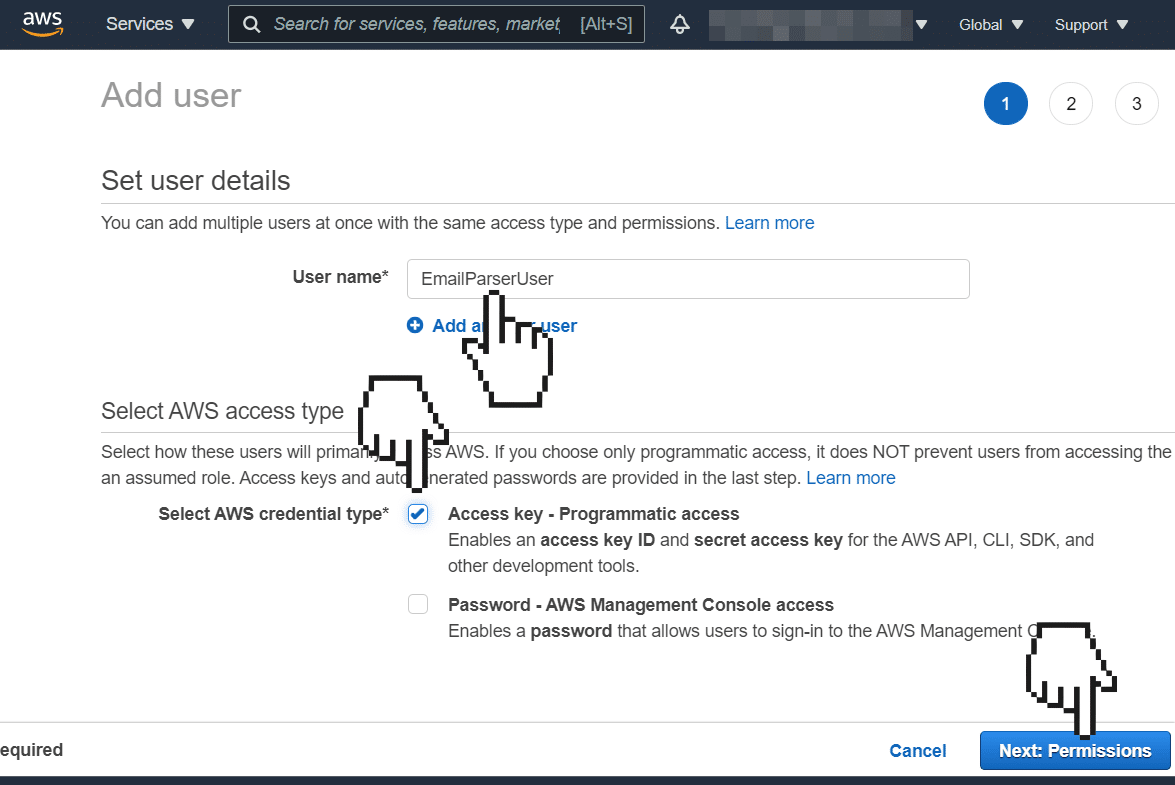
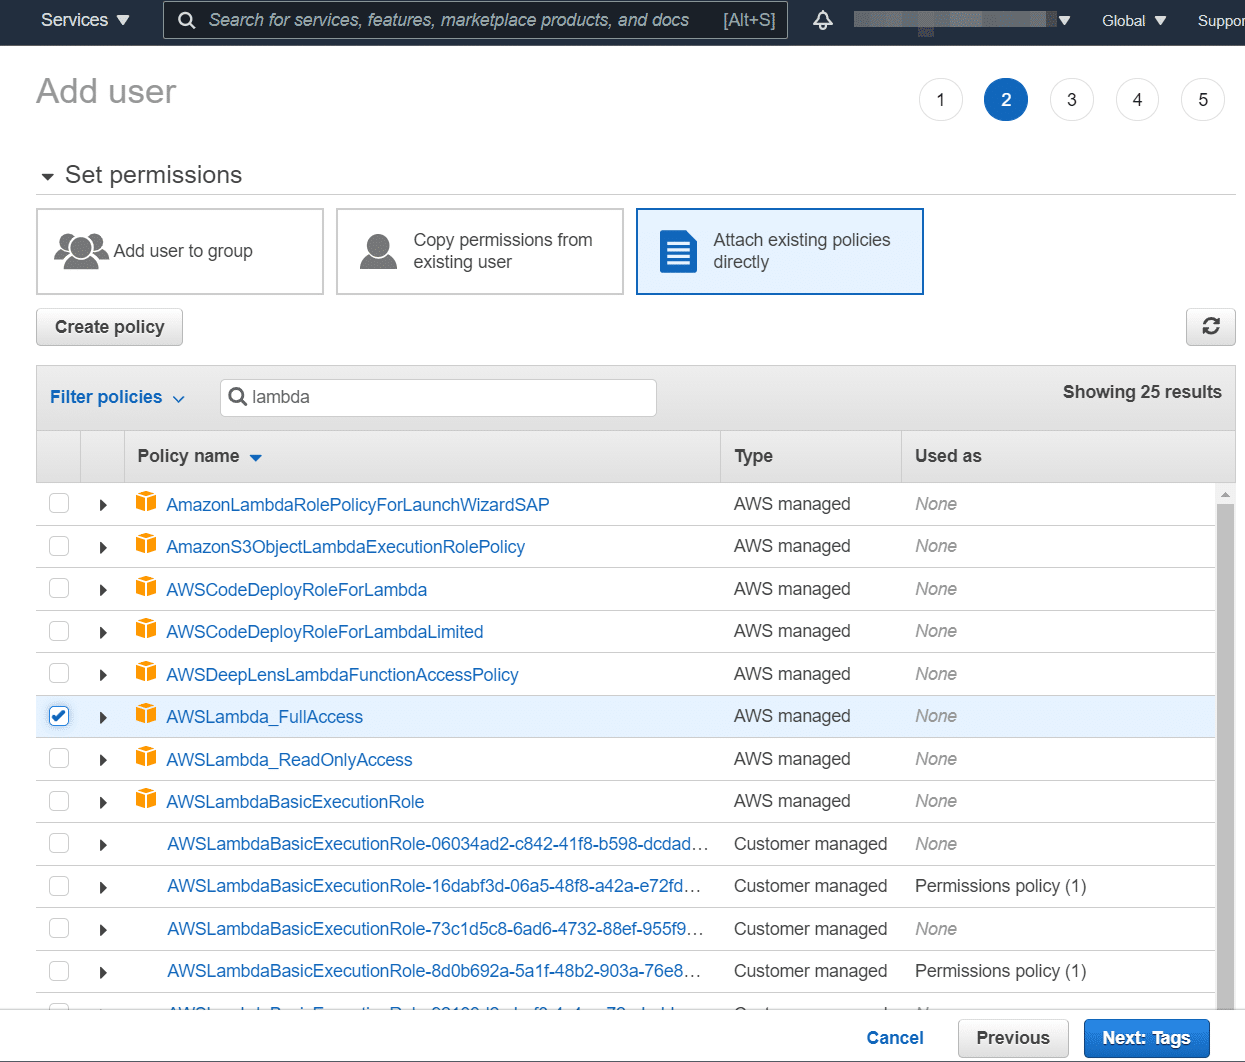
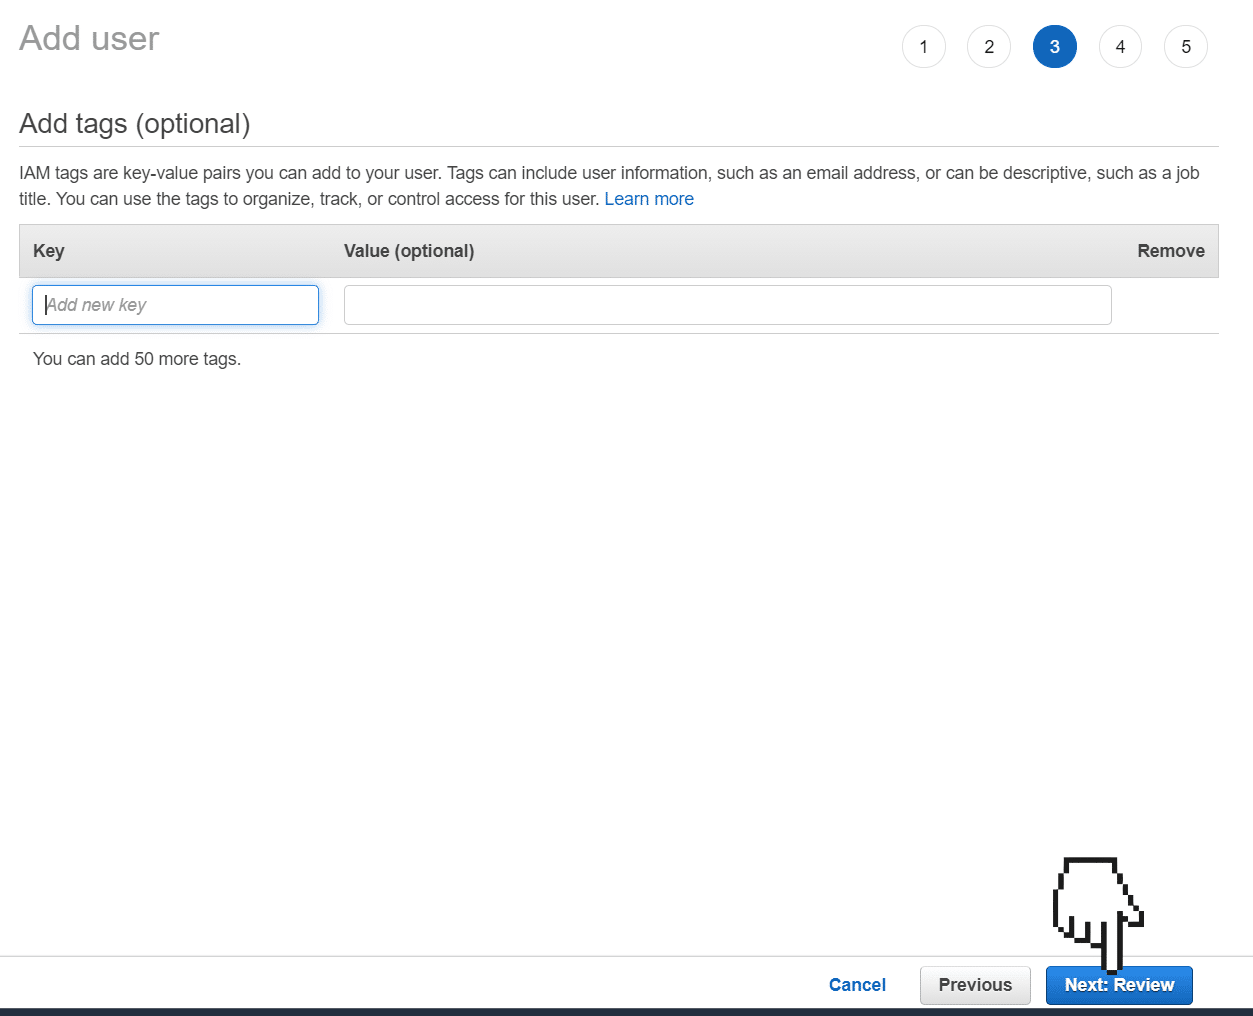
Step 3: Create the IAM user
Create a new IAM user named EmailParserUser. This user provides the credentials that Email Parser (both the Windows app and the Web app) will use to invoke, update, and list the Lambda functions available in your AWS account.
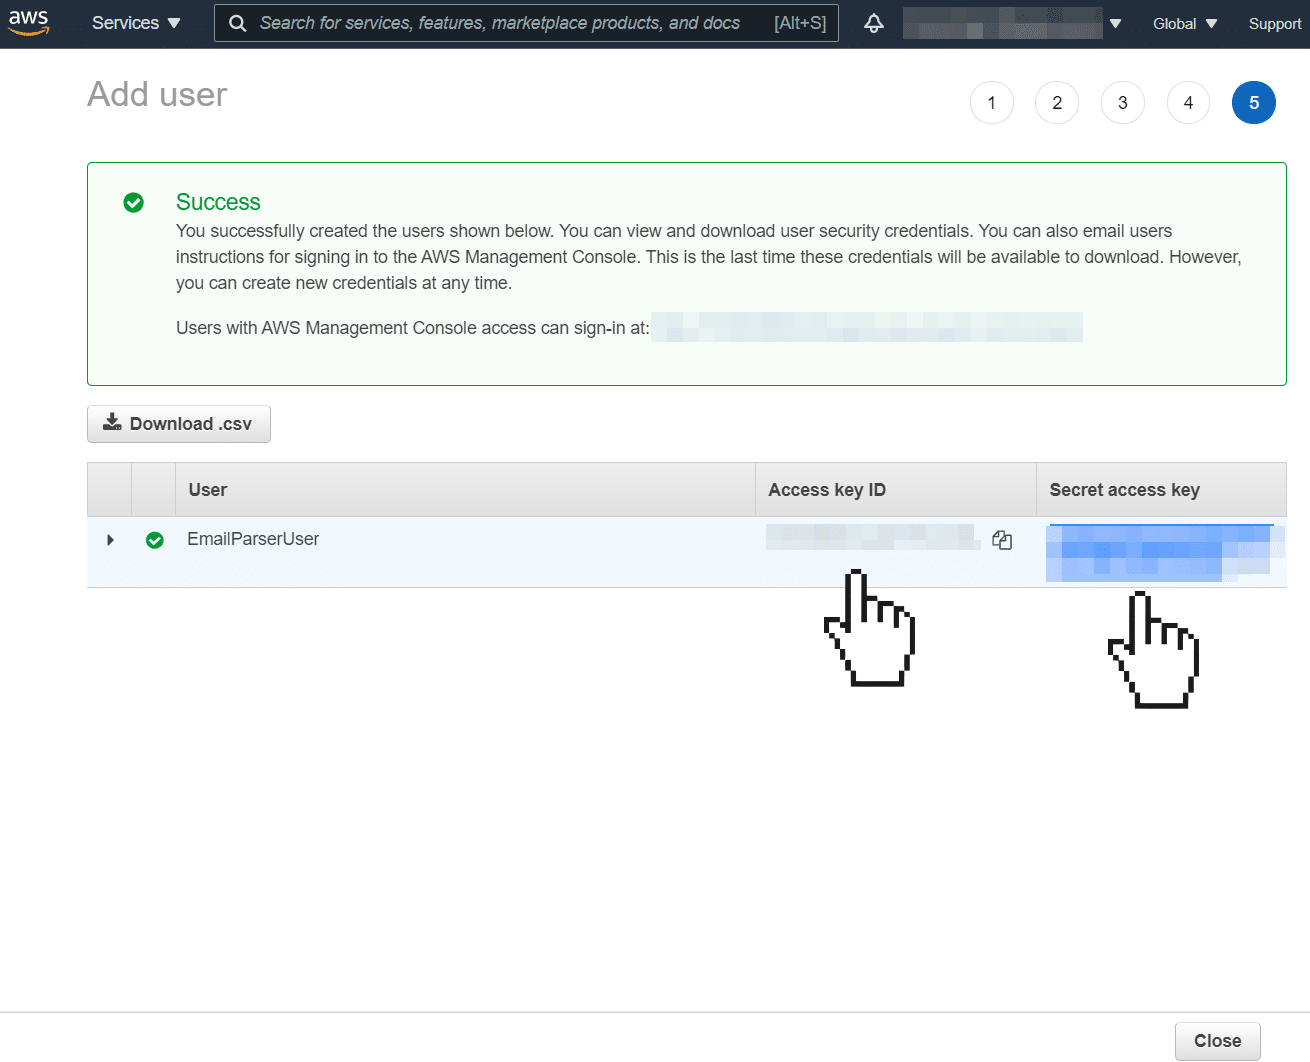
Step 4: Copy the credentials to Email Parser
Finally, copy the access key and secret key from the IAM user you just created and paste them into the AWS Lambda action settings in Email Parser: