How to Send an HTTP Request
See also:
Sending data to Zapier
Sending data to IFTTT
The HTTP request action allows you to connect your email workflows to any external service that exposes a REST API. You can use it to send parsed data to a remote server, query an API and retrieve information for use in subsequent actions, or integrate with third-party platforms that accept HTTP calls.
Fields generated by the HTTP request action
One of the most important things to know about the HTTP request action is that, once it runs, it automatically generates four fields that become available for any subsequent action in the workflow:
- HttpRequestURL: the full URL that was used in the request, including any URL parameters.
- HttpRequestHeaders: the headers that were sent along with the request.
- HttpStatus: the HTTP status code returned by the server (for example,
200 OKfor a successful request or404 Not Foundif the endpoint does not exist). This field is especially useful when combined with a bifurcation action to check whether the request was successful before continuing with other actions. - HttpResponse: the actual response body returned by the server. This is typically the most valuable field, as it contains the data you requested. You can use it in any subsequent action, for example, to populate a database, send it as part of an email reply, or feed it into another HTTP request.
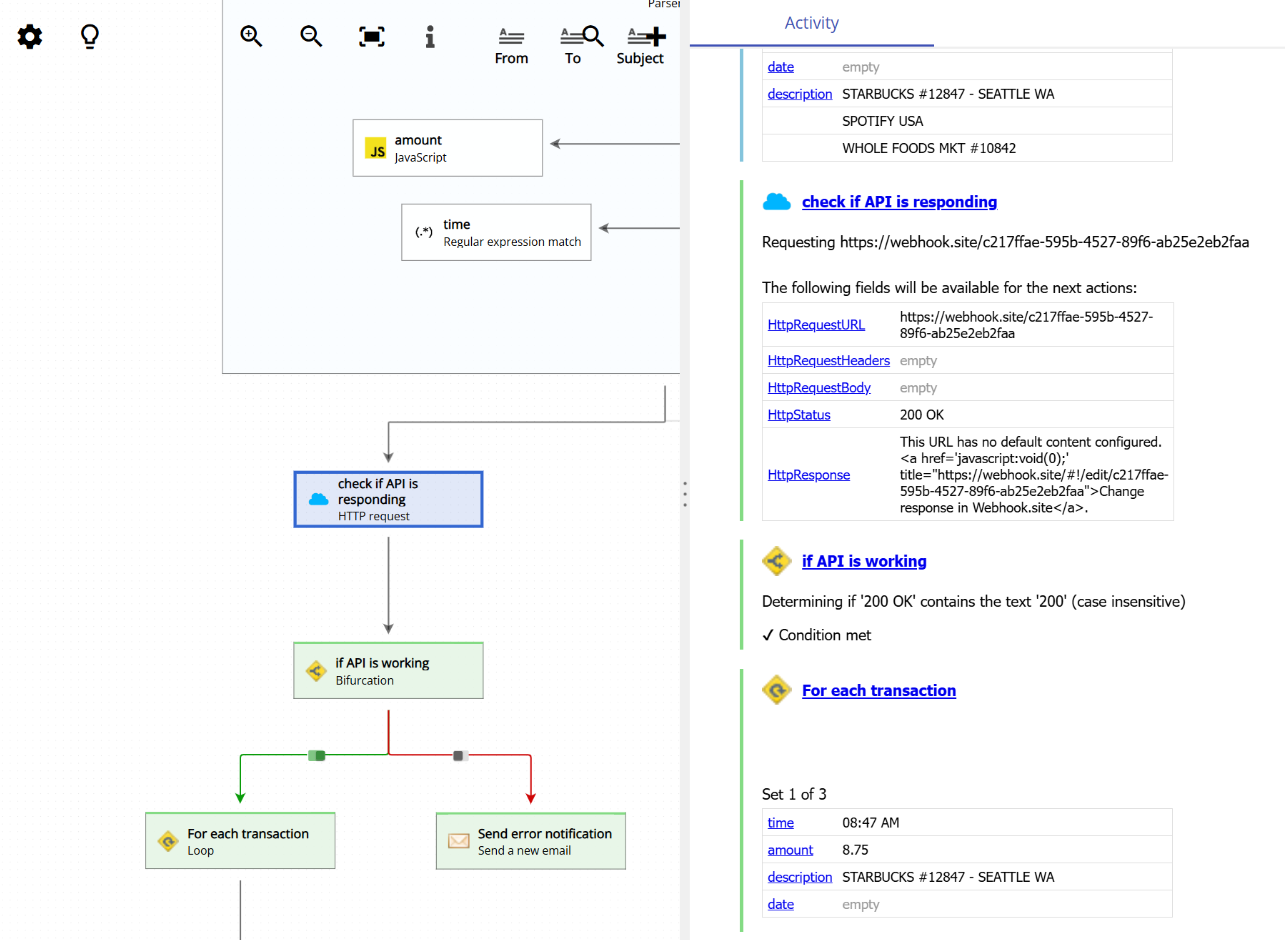
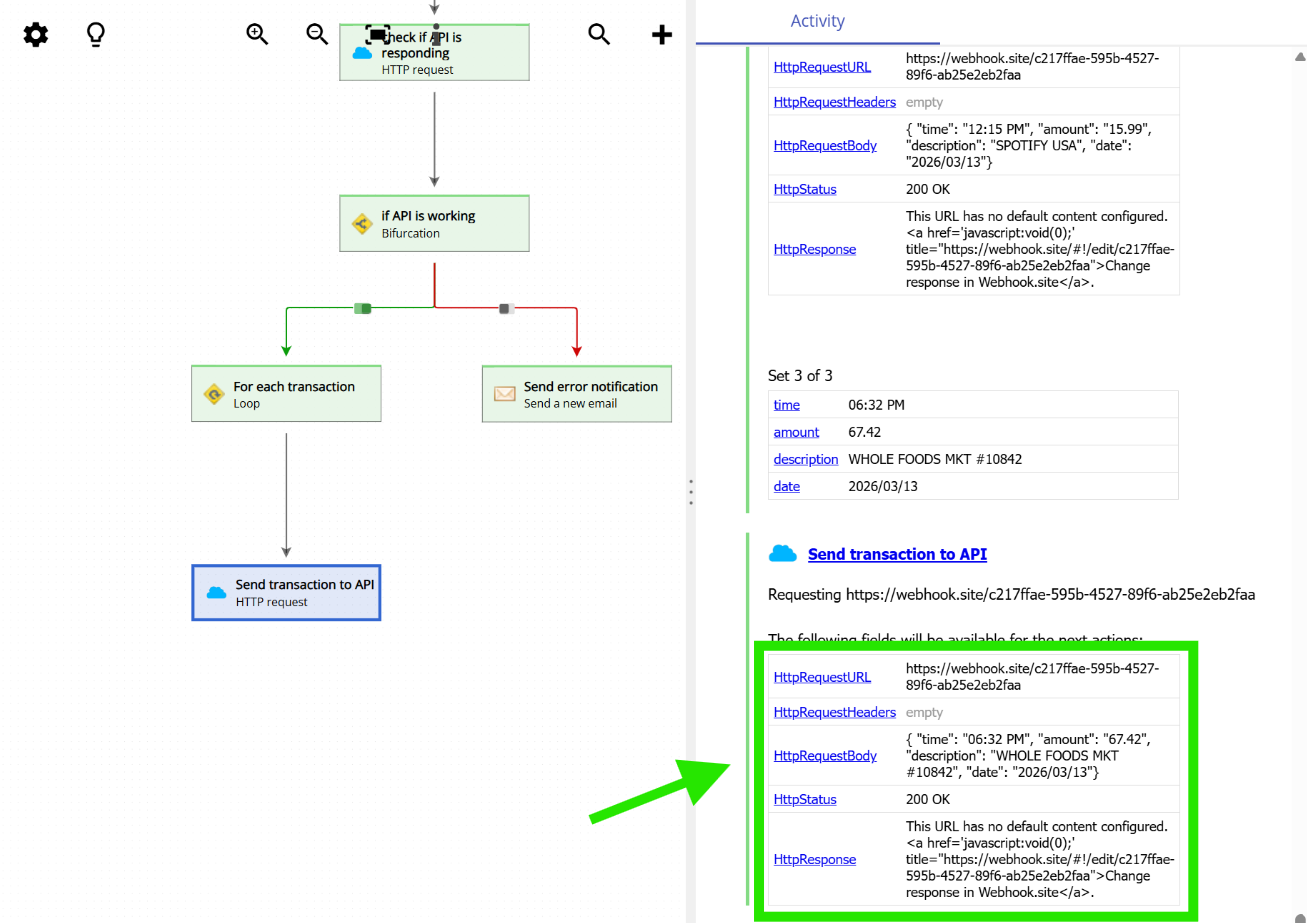
The following screenshot shows these generated fields in the Activity panel after running an HTTP request action. Notice how both the first HTTP request (“check if API is responding”) and the second one (“Send transaction to API”) produce their own set of fields:
Configuring the HTTP request action
To set up an HTTP request action, you first need to choose the HTTP method (such as POST, GET, PUT, or DELETE) and enter the destination URL. The URL can include field placeholders if you need to build it dynamically from parsed email data. Below the URL, there are four tabs that let you configure different aspects of the request:
- URL parameters: this tab lets you define a list of query parameters that will be appended to the URL. This is useful when the API you are calling expects data as URL parameters (for example,
?key=value&another=value2). - Authorization: this tab is used to configure authentication. You can choose between three options: No authorization (for public endpoints that do not require authentication), Basic HTTP auth (which sends a username and password), or Bearer token (which sends an authorization token in the request header, commonly used by modern APIs).
- Headers: this tab allows you to add custom HTTP headers to the request. A common use case is setting the
Content-Typeheader toapplication/jsonwhen working with REST APIs, but you can add any header that the server expects. - Body: this tab is where you define the content of the request body. You can choose between three encoding formats: form-data, x-www-form-urlencoded, and raw. The raw option is particularly useful for sending JSON payloads, as it lets you write the body content directly and use field placeholders to include parsed email data.
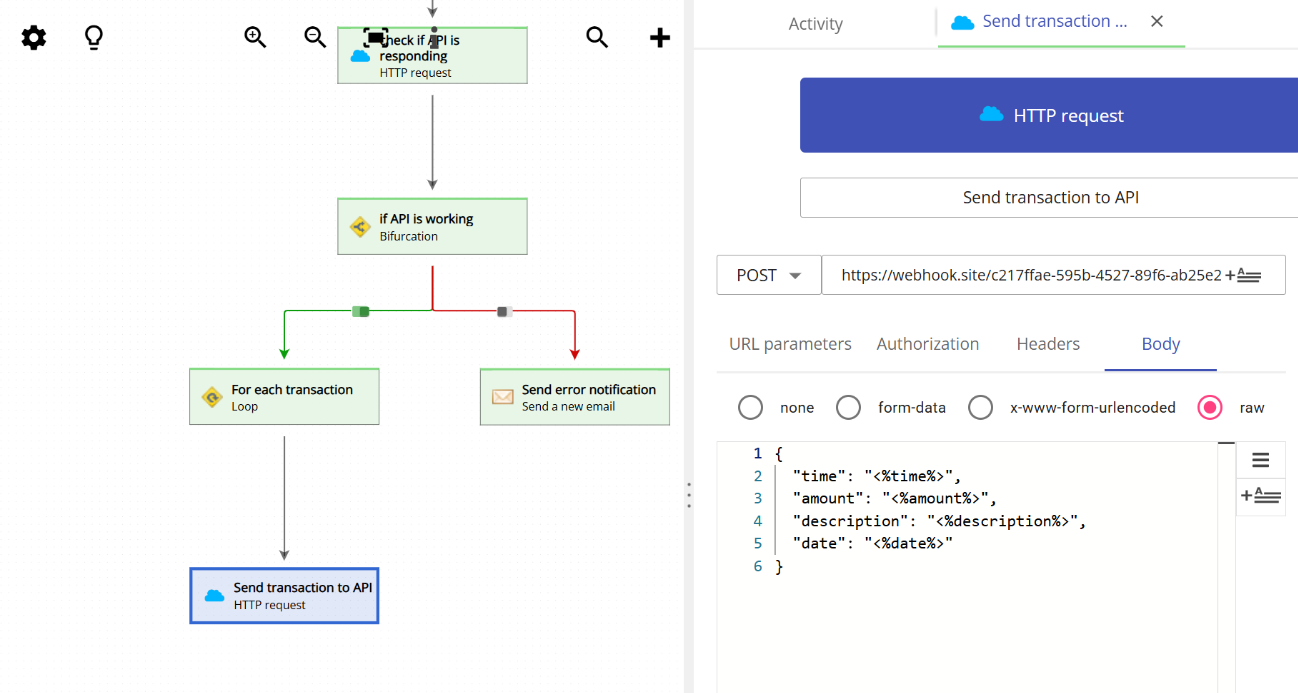
The following screenshot shows an example of an HTTP request action configured to send a POST request to an API endpoint. The Body tab is selected with the raw format, containing a JSON payload that uses field placeholders like <%time%>, <%amount%>, and <%description%> to include data parsed from the email:
Using the HTTP response in your workflow
A common pattern when working with the HTTP request action is to check the response status and then use the response data in subsequent actions. For example, you can place a bifurcation action right after the HTTP request to verify that the server returned a successful status code (such as 200 OK). If the request was successful, the workflow continues with the normal processing. If it failed, you can route the workflow to an alternative path, such as sending an error notification email.
The screenshot below shows a workflow that demonstrates this pattern. The first HTTP request action (“check if API is responding”) sends a request and its response is evaluated by the bifurcation action (“if API is working”). If the API is responding correctly, the workflow proceeds to loop through each transaction and send the data to the API. If the API is not responding, an error notification email is sent instead: