☰ TOPICS
How to parse Amazon dispatch notifications
See also:
Capturing an HTML tag from an email
Exporting to Google Sheets
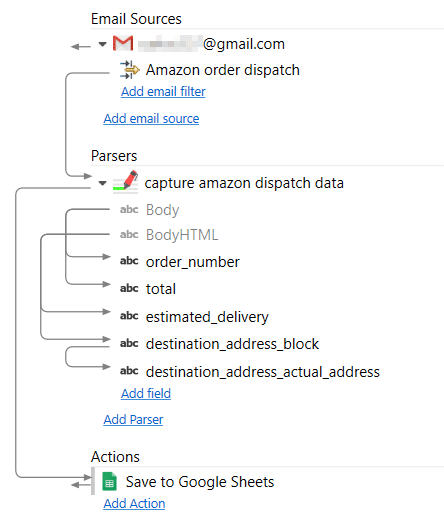
- The Amazon order number. We will call the field order_number and will use the parsing method Starts after… continues until using the plain text version of the email as input
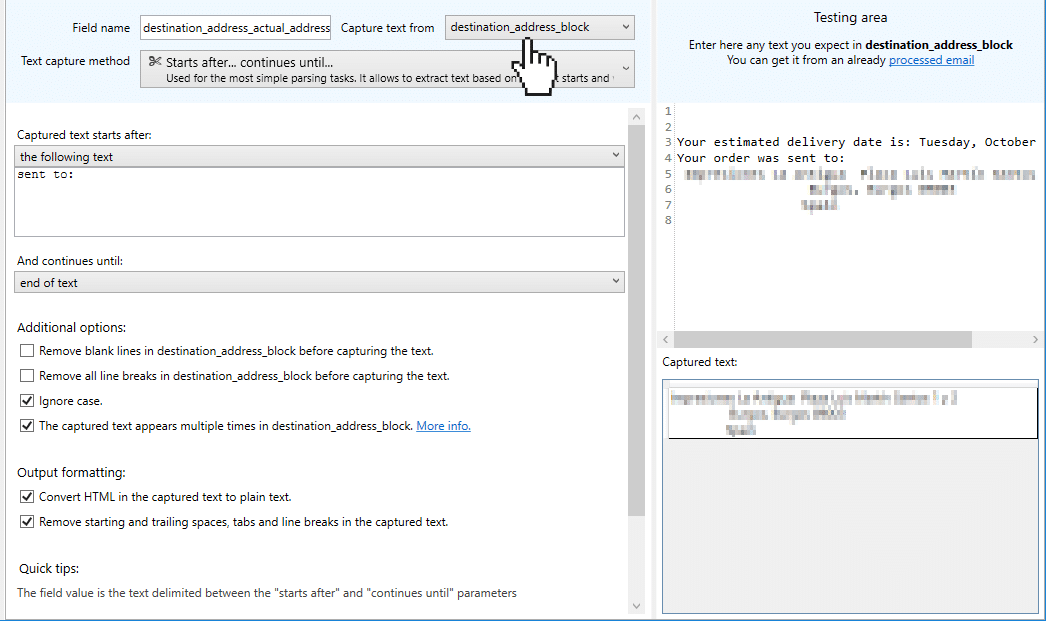
- The delivery address. We will first capture all the block of text at the top right and call it destination_address_block using the parsing method Capture HTML tag from the HTML version of the email body. Then we will use this block as input to capture the actual address (which starts in the second line) and we will call it destination_address_actual_address.
- The estimated delivery date. This field will be called estimated_delivery and will use the method Capture HTML tag.
- The total amount. This is the field called ‘total’ and is parsed using the method Starts with… continues until using the plain text version of the email as input.
- The date this email was sent by Amazon. This is the default email field DateTimeSent so we use this field in the Google Sheet action.
Email filter Amazon order dispatch:
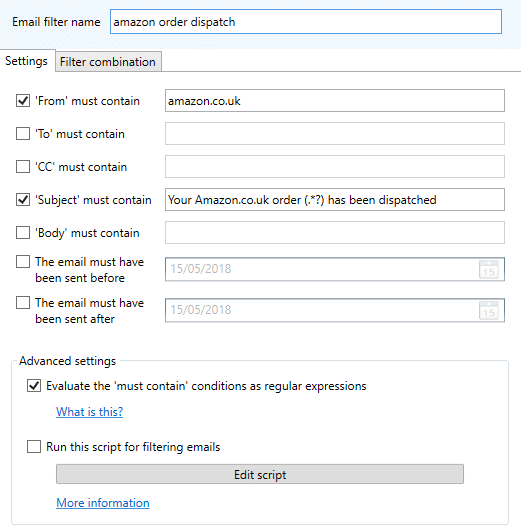
Your Amazon.co.uk order (.*?) has been dispatchedThis regular expression is very simple, the element .*? means any text, so any subject containing that format will be processed by the following items.
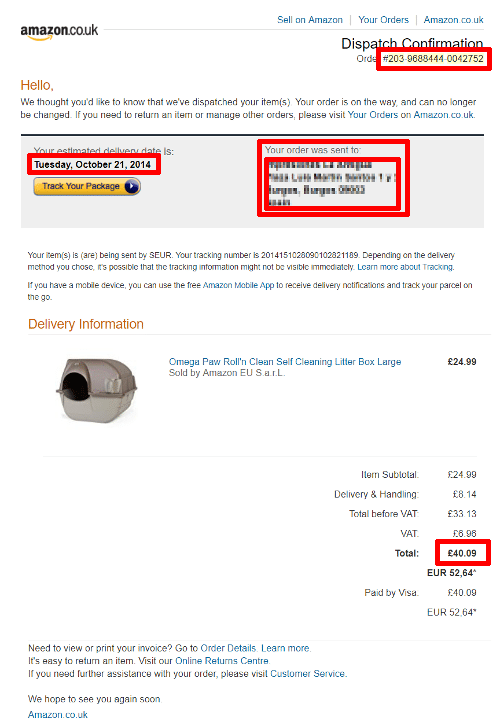
Field order_number
The order number appears in the top right of the email body. We will take it from the plain text version of the email, which looks like this: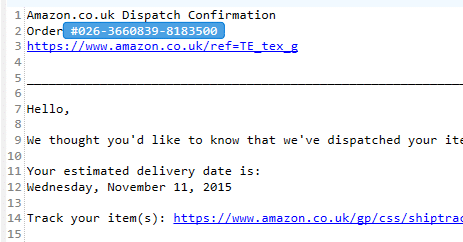
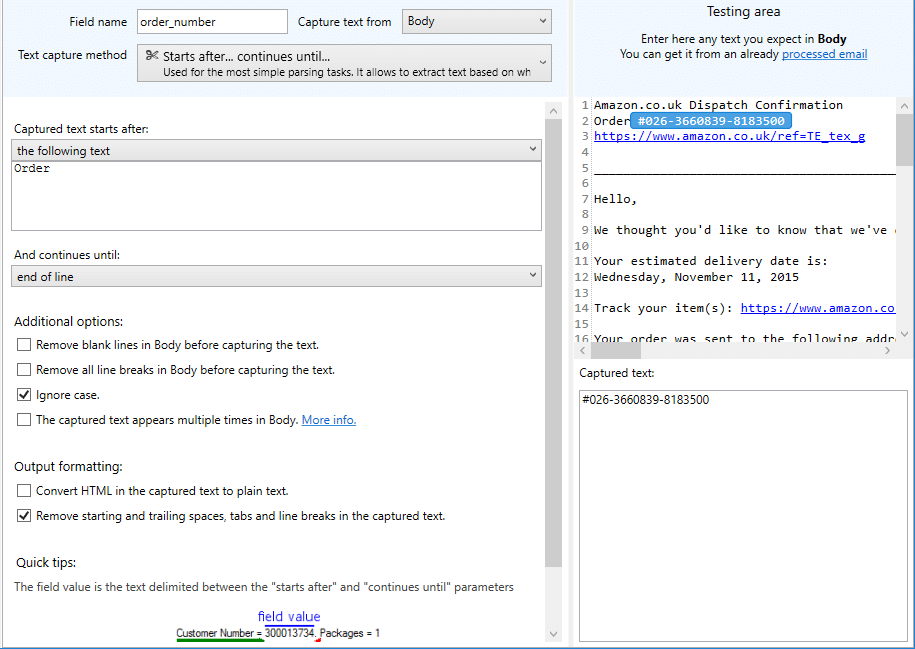
Field total
The total amount of the order is stored in a field called total in Email Parser. We also use the technique Starts with… continues until… to get this information. Let’s see how it looks like: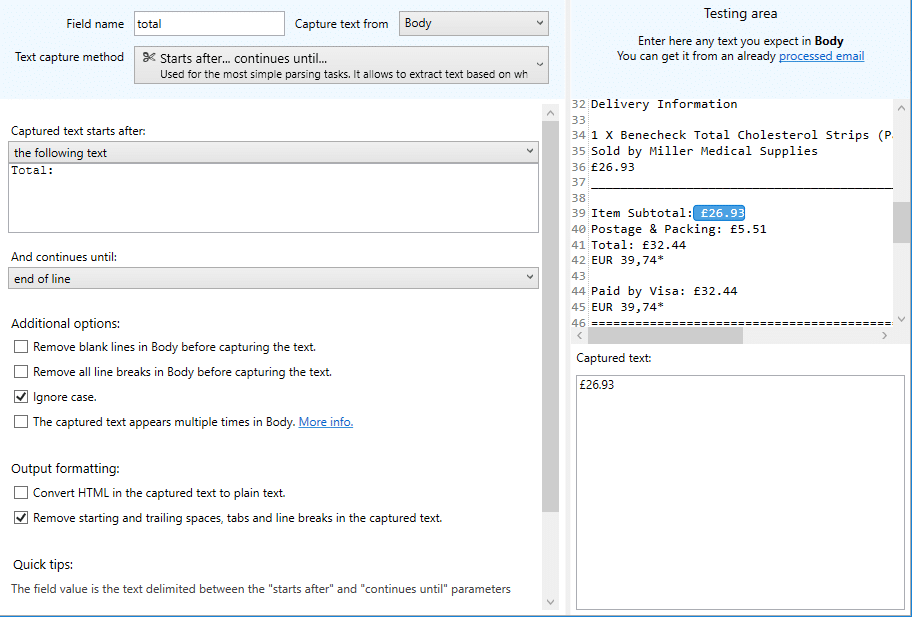
Field estimated_delivery
With this field we use a more complex technique: Capture HTML tag. We have found taking a look at the HTML version of the email body that Amazon puts this information in <strong> tag:
Fields destionation_address_block and destionation_address_actual_address
We use two steps to capture the destination address of the Amazon order. In the first step, we capture the area of the text of the email containing the physical address but also other information. Then, in the second step, we separate the address from the rest of information we do not need. The result of the first step is called destination_address_block and is captured like this: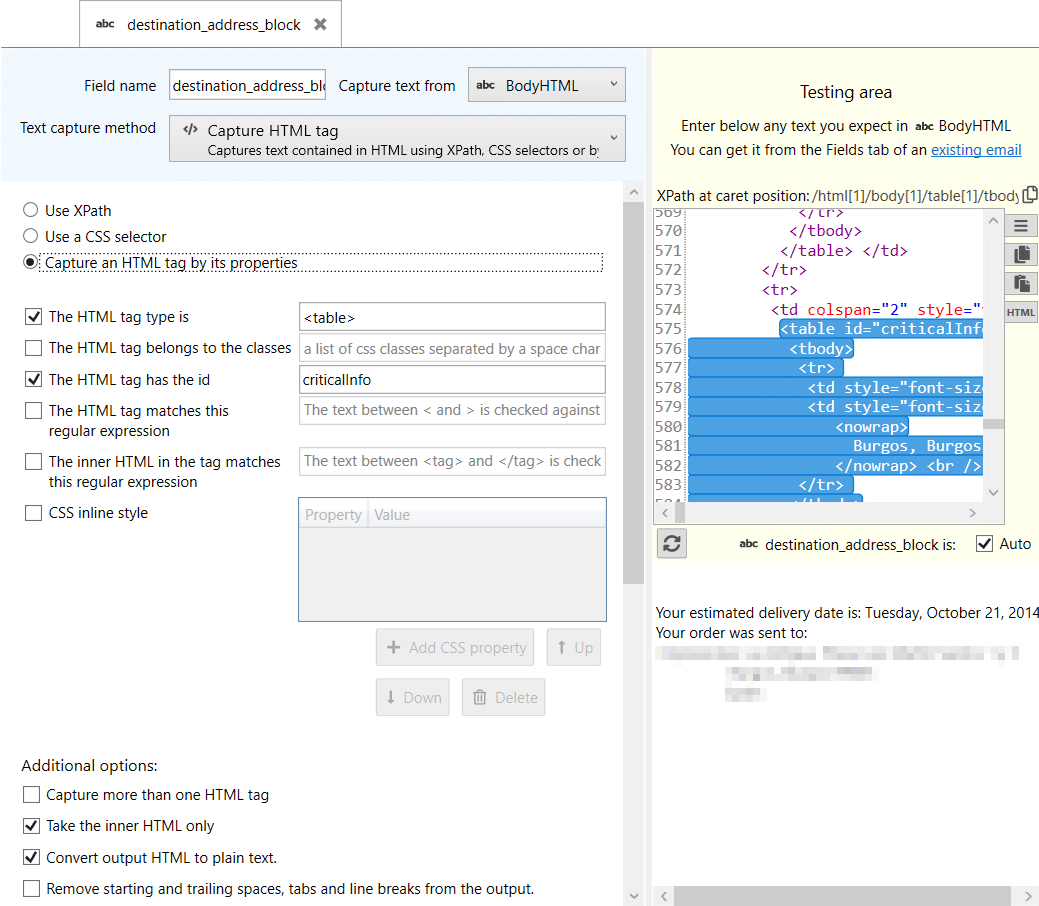
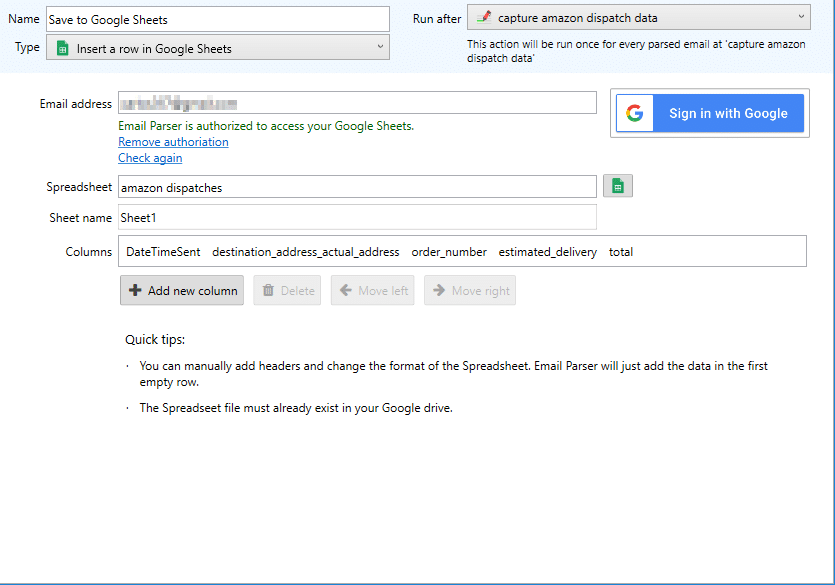
Action Save to Google Sheets
The final step in this example is to save the field we have retrieved from the email (except destination_address_block, which is a field we used to store intermediate text). The action looks like this: