How to set up a POP email account
See also:
How to set up an IMAP email account
POP (Post Office Protocol) is one of the oldest email protocols still in use. While it is widely supported by most email providers, it lacks several features found in more modern protocols. For example, POP does not support searching for emails on the server, organizing messages into folders, or instant email retrieval (also known as push notifications). Because of these limitations, it is recommended to use POP only if your email provider does not support a more capable protocol like IMAP or Exchange.
That said, setting up a POP email account in Email Parser is straightforward and takes just a couple of steps.
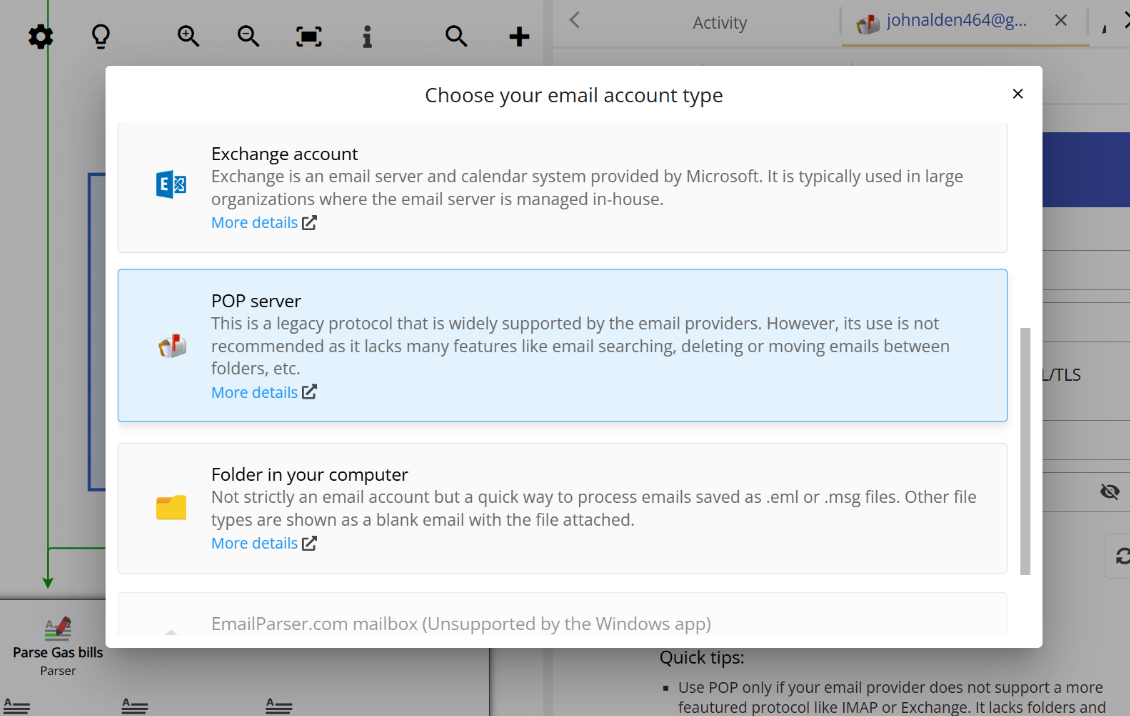
Choosing POP as the email account type
To add a POP email account, follow these steps:
- Click the + button on the toolbar.
- Select Add email account.
- On the right panel, click Choose your email account type.
- Select POP server from the list.
The screenshot below shows a POP email account that has been correctly configured. Notice the Status field at the bottom, which reads “Connected. Waiting for new email.” This confirms that Email Parser has successfully connected to the POP server and is ready to receive emails:
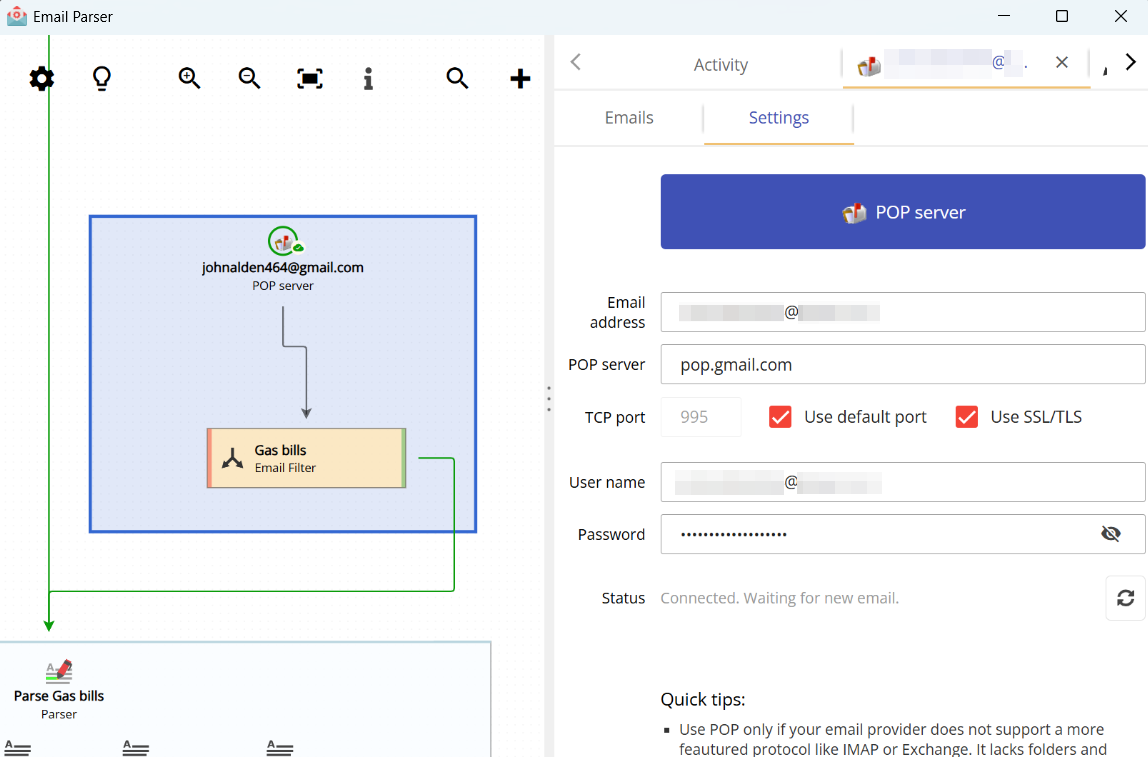
If the connection fails, double-check the server address, port, and credentials. Also make sure that POP access is enabled in your email provider’s settings, as some providers disable it by default.