Moving an email to another folder
Email Parser includes an action called “Move email” that lets you automatically move an email to a different folder in your mailbox. This is very useful for keeping your inbox organized and for separating emails that have already been processed from those that have not.
To use it, create a new action and select “Move email to folder” from the list of available action types:

Moving processed emails to a separate folder
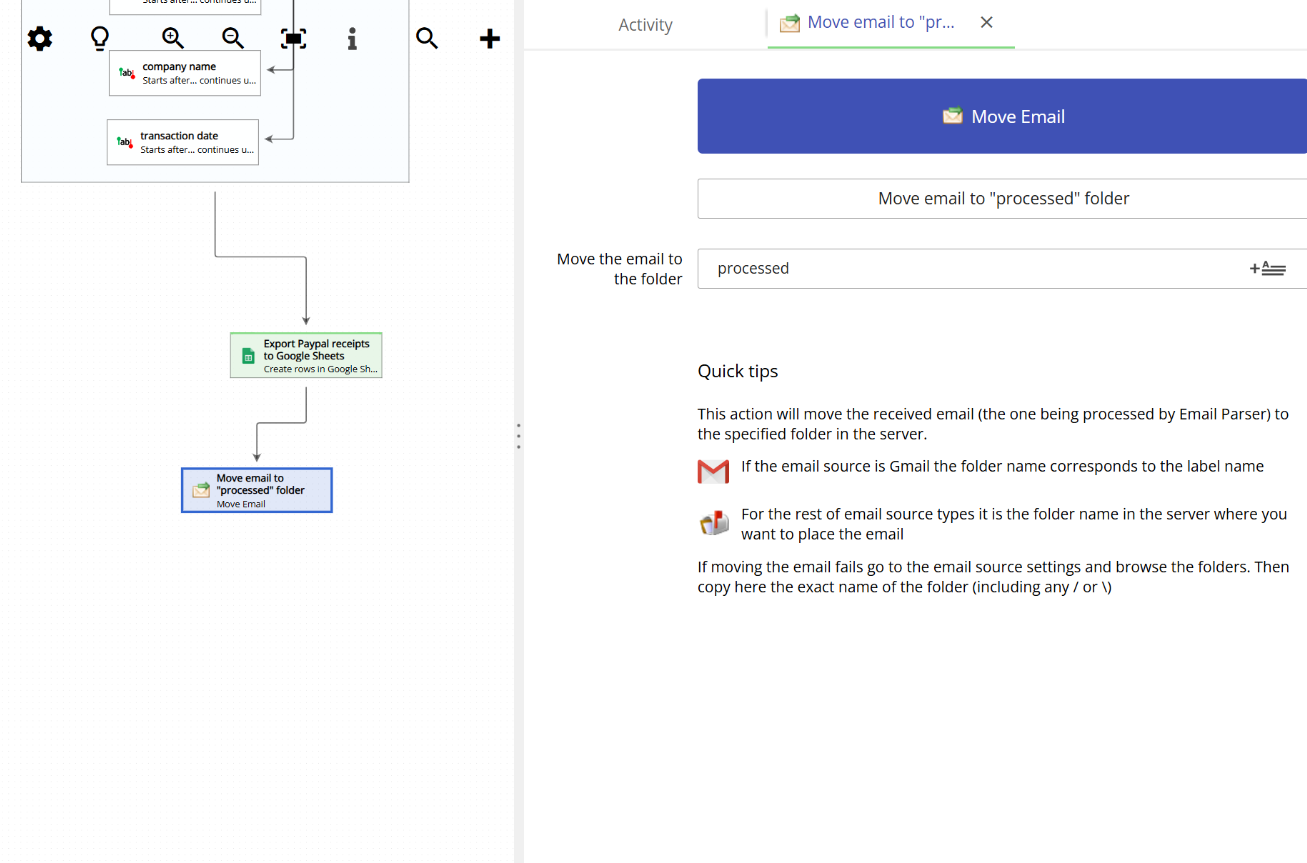
The most common use of this action is to move an email to another folder once it has been fully processed. For example, after Email Parser has extracted the relevant information from an incoming email and saved the results to a spreadsheet or a database, you may want to move that email to a folder called “Processed” to keep your inbox clean.
In the activity log, you can see that the email has been successfully moved to the destination folder:

Classifying emails automatically using filters
Another popular use of this action is to classify incoming emails by type. By combining email filters with multiple “Move email” actions, you can automatically sort emails into different folders based on their content.
For example, imagine you receive utility bills by email from different providers. You could create three email filters, one for Gas bills, one for Water bills, and one for Electricity bills. Each filter would then be connected to a separate “Move email” action that moves the email to the corresponding folder. The following workflow diagram shows this setup:

This approach is very flexible. You can add as many filters and move actions as you need to classify emails into as many folders as required.
Setting the destination folder
When you open the configuration window of a “Move email” action, you will see a text field where you need to type the name of the destination folder. This is the folder where the email will be moved to:
Note that the destination folder name must be entered manually. There is no browse button or folder picker in this window. If you are unsure of the exact folder name, you can check the available folders by double-clicking on the email account in the workflow diagram. Under the Settings tab of the email account, click the folder icon (or the label icon if you are using Gmail) to see all the available folders:
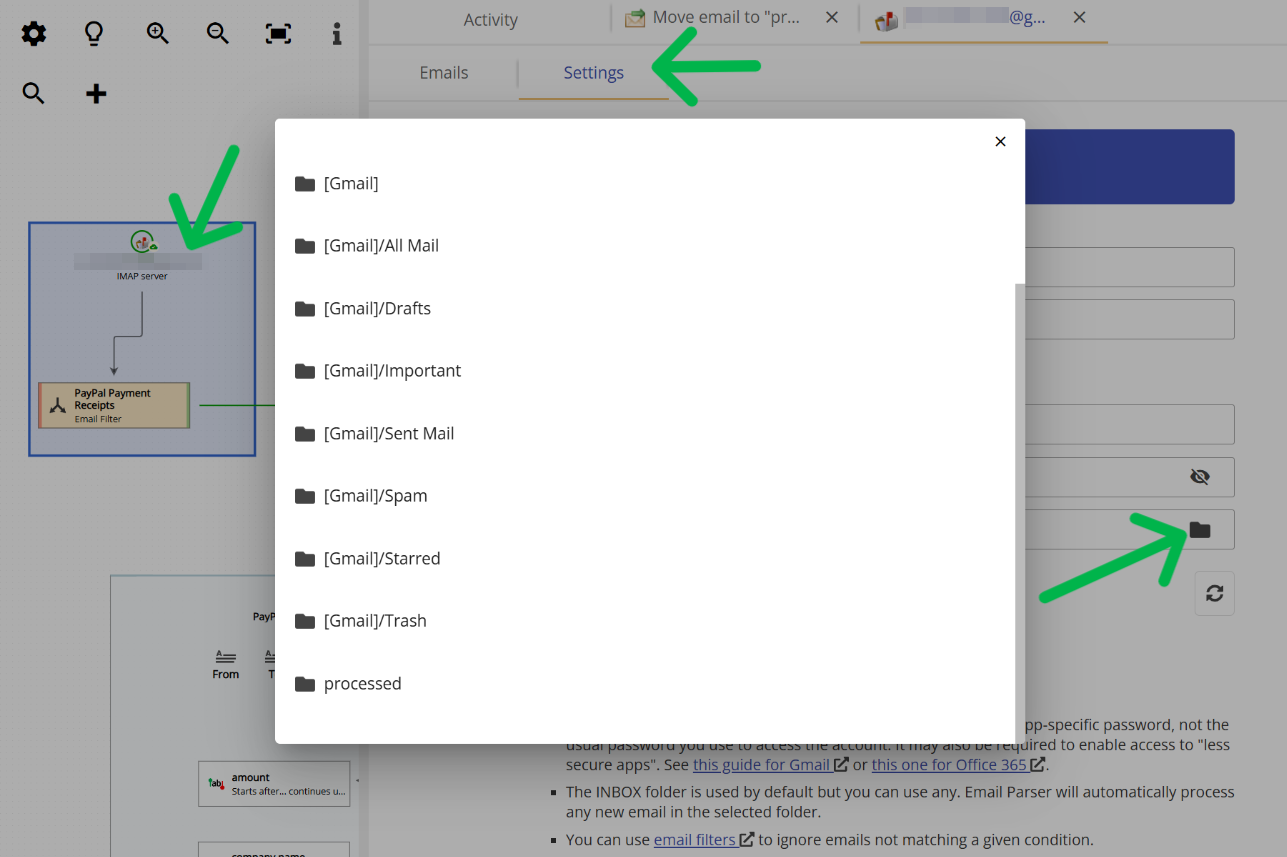
Once you see the folder names listed there, type the exact same name in the “Move email” action configuration.