Running a SQL statement in an ODBC-compatible database
See also:
Where to download the ODBC driver for your database
ODBC (Open Database Connectivity) is a standard interface that allows Email Parser to connect to virtually any database through a driver. Most database systems provide an ODBC driver that you can download and install. For a list of the most commonly used drivers and their download links, see the ODBC driver downloads page.
With this action, you can run SQL statements (such as INSERT, UPDATE, or SELECT) against any ODBC-compatible database. This is especially useful when your database does not have a dedicated action type in Email Parser, or when you need to use a less common database system.
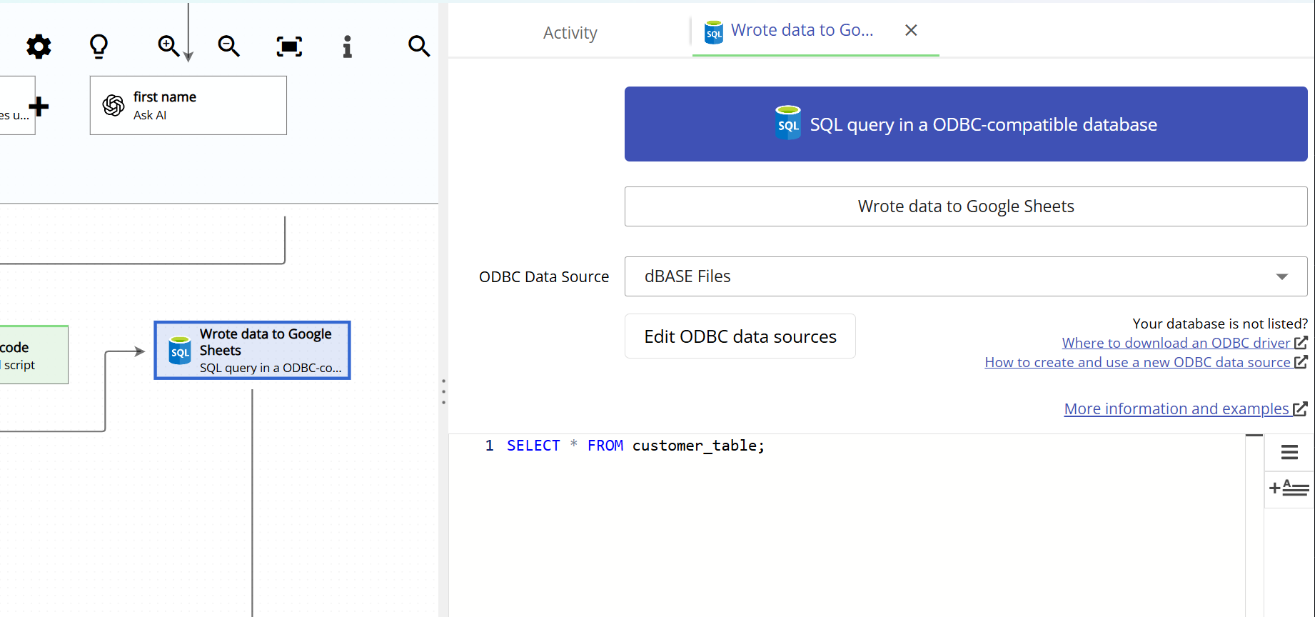
How the ODBC action looks in Email Parser
The screenshot below shows the ODBC action editor. At the top, you select the ODBC Data Source (DSN) you want to connect to. Below that, there is a SQL editor where you write the query to run. You can use field placeholders in the SQL statement to insert values extracted from emails.
Step-by-step instructions
Follow these steps to set up an ODBC action in Email Parser:
- Install the ODBC driver for your database (if it is not already installed). You can find download links for the most popular database drivers on the ODBC driver downloads page. If you are unsure whether the driver is already installed, you can check in step 4 by clicking the “Drivers” tab in the ODBC Data Source Administrator.
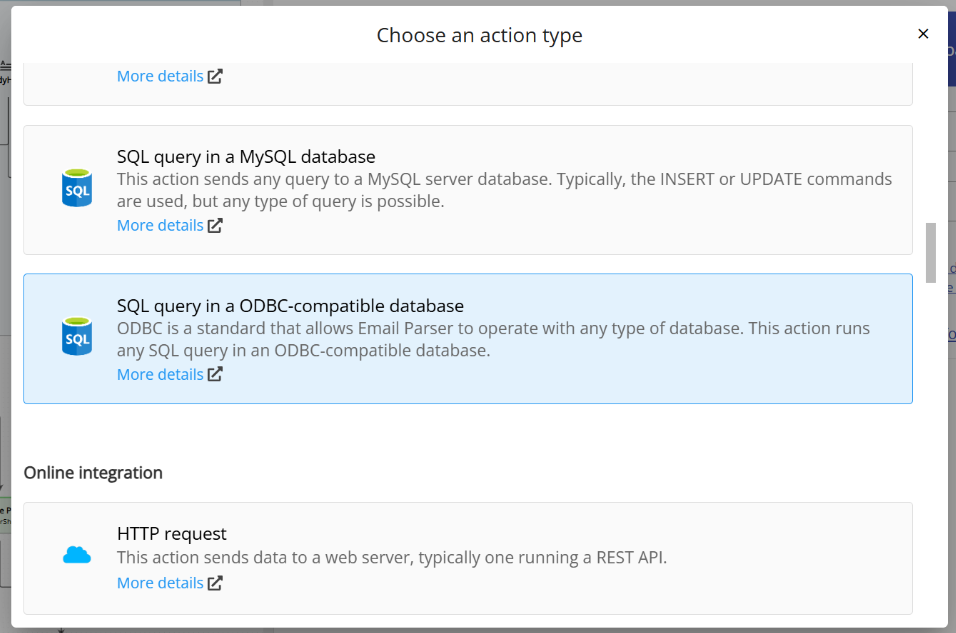
- Create a new action and select “SQL query in a ODBC-compatible database” as the action type.
- Click “Edit ODBC data sources” to open the Windows ODBC Data Source Administrator. This is the built-in Windows tool for managing ODBC connections.
- Create a new DSN (Data Source Name) by clicking the “Add” button in the ODBC Data Source Administrator. Configure it with the connection details for your database (server address, database name, credentials, etc.).
- Select the DSN in Email Parser. After creating the DSN, go back to Email Parser. The newly created data source should appear in the “ODBC Data Source” dropdown. If it does not appear immediately, wait a few seconds as Email Parser refreshes the list automatically.
- Write your SQL statement in the editor. You can include field placeholders to dynamically insert values extracted from your emails into the query.
Common issues and questions
I have created a DSN but it does not appear in Email Parser
If you are running Email Parser as a Windows service (see running modes), you need to create a system DSN instead of a user DSN. Windows services run under a different user account and do not have access to user-level DSNs. Open the ODBC Data Source Administrator and switch to the “System DSN” tab to create one that Email Parser can access.
How do I open the Windows ODBC Data Source Administrator?
The easiest way is to type “ODBC” in the Windows Start menu search bar. It will show up as “ODBC Data Sources.” You can also access it from the classic Control Panel. Alternatively, you can click the “Edit ODBC data sources” button directly inside the Email Parser action editor, which opens the administrator for you.