How to enable IMAP access for your Office 365 account
See also:
Enabling IMAP on Gmail
How to set up an Office 365 email account
Note that the instructions given in this help topic are no longer valid.
Starting on September 2022, Microsoft has stopped accepting basic authentication (used in IMAP) for Office 365 accounts.
Change your email source type in
Email Parser to
Office 365 to access your email.
More details on the Microsoft changes
here
IMAP is disabled by default in Office 365. If you want to access your Office 365 email account using IMAP you have to manually enable it. Here is a step-by-step guide on how to do so:
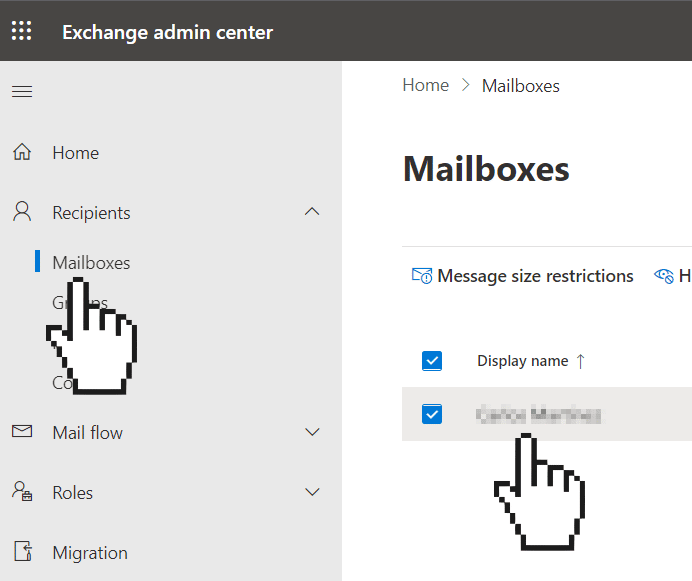
- Go to your Exchange admin center. It can be also accessed via the Office 365 home page ➡️ All Apps ➡️ Admin ➡️ Show all ➡️ Exchange Admin center.
- Then click on Mailboxes and select the Mailbox where you want to enable IMAP access:
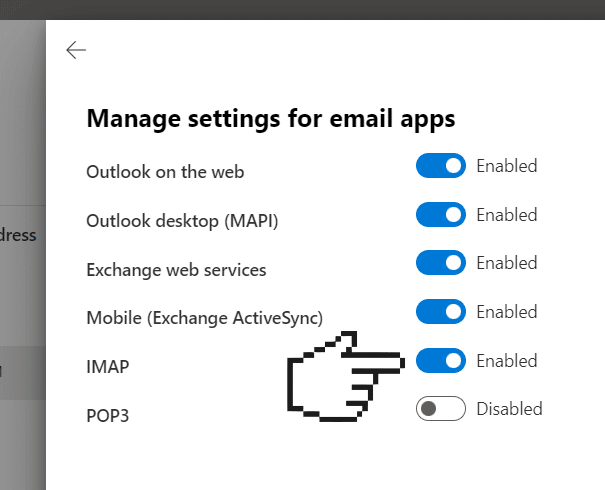
- On the right panel, click on “Manage email apps settings”:
- Finally, enable IMAP and click “Save”:
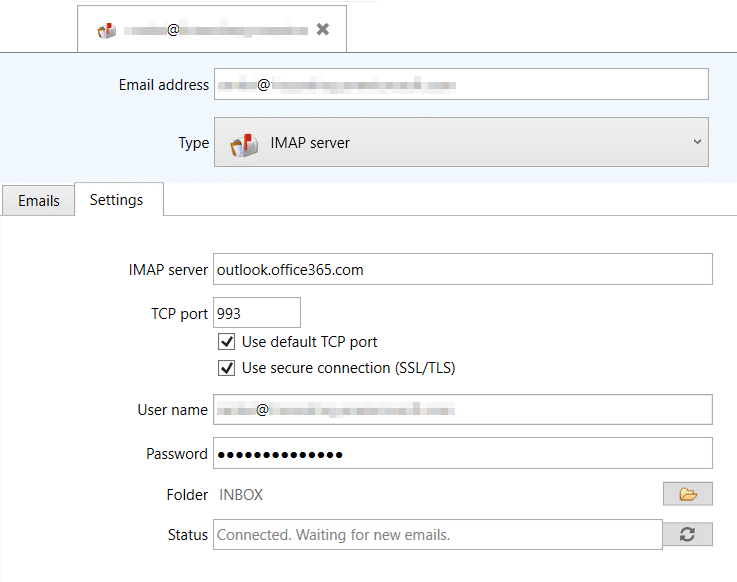
- Now, you can use IMAP with these settings:
| IMAP server |
outlook.office365.com |
| TCP port |
993 |
| User name |
your Office 365 email address |
| Password |
your Office 365 password |
In Email Parser, it should look as following
Common issues and questions
I get the error “Wrong account name and/or password”
Wait a few minutes. Sometimes, enabling IMAP takes a few minutes to take effect.
After waiting a few minutes, I still get the error “Wrong account name and/or password”
You need to create an app specific password because of the policy rules in your Office 365 account. This option is seen only for the users with
two-step authentication enabled. Go to
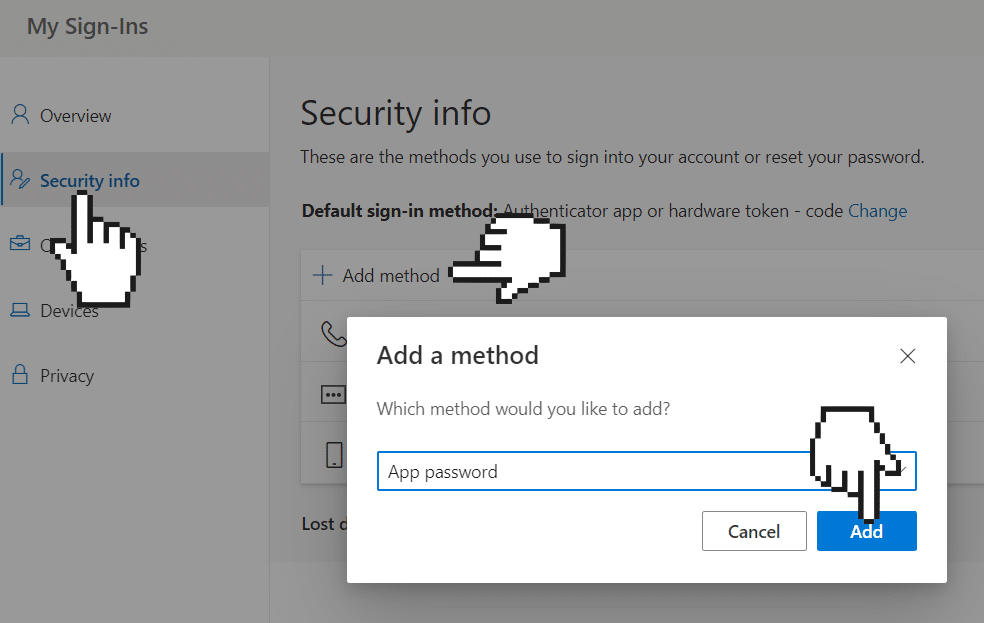
My Sign-ins ➡️ Security info and click on “add method”. Then choose “app password”:
Now, you can use the generated password under Email Parser.
I cannot find the Exchange admin center under my Office 365 account
You need to be logged in as an user with administrator rights in the Office 365 website.


