This help topic applies to the Windows app only.
The web app does not provide access to the internal folder structure.
See also:
Loading and saving the settings to a file
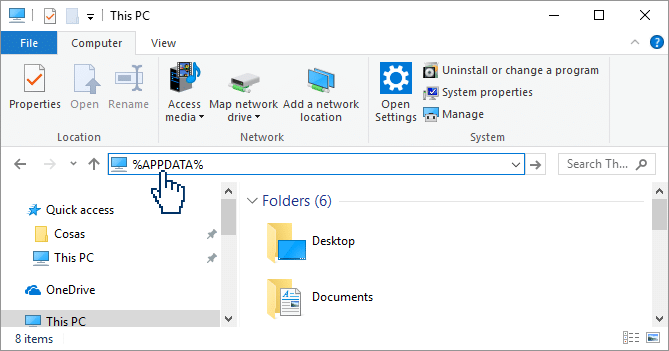
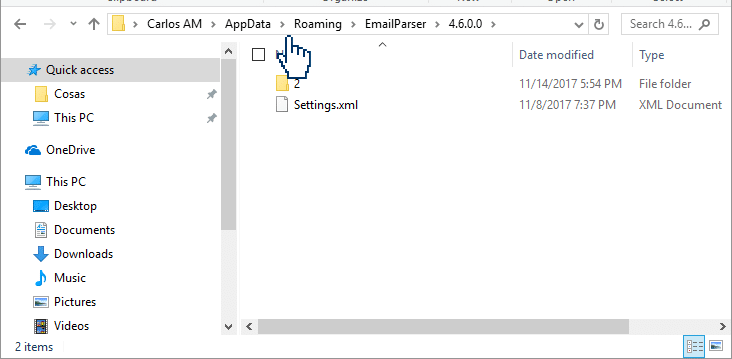
%APPDATA% in the File Explorer’s address bar (the path may vary slightly depending on your Windows version). Usually, this path is “C:\Users\UserNameHere\AppData\Roaming\EmailParser\”

The most important file in this folder is Settings.xml. This file stores the information for all the items you see in the left panel of Email Parser.
Advanced users can directly edit this file with a text editor like Notepad to add or remove items. However, it’s crucial to ensure the edits follow proper XML syntax. Remember to close Email Parser before making any changes.
This method is particularly useful for users with a large number of email filters. It allows them to automate the creation of new filters and potentially integrate Email Parser with other tools.
Editing the Settings.xml file is an advanced task and goes beyond the scope of this guide. For reference, here’s an example of what the XML for an email filter might look like.
 <EmailFilter>
 <additional_filters_condition>Must_be_blocked_by_any_of_the_following_filters</additional_filters_condition>
     <name>emails from alex</name>
     <id>4</id>
     <enabled>true</enabled>
     <filters_email_from_the_email_source_id>2</filters_email_from_the_email_source_id>
     <from>alex@test.com</from>
     <apply_from>true</apply_from>
     <to />
     <apply_to>false</apply_to>
     <subject />
     <apply_subject>false</apply_subject>
     <body />
     <apply_body>false</apply_body>
     <received_after>2013-11-20T22:58:33.1822699+01:00</received_after>
     <apply_received_after>false</apply_received_after>
     <received_before>2013-11-20T22:58:33.1822699+01:00</received_before>
     <apply_received_before>false</apply_received_before>
     <apply_script_filter>false</apply_script_filter>
     <script_filter />
     <script_referenced_assemblies />
     <apply_additional_filters>false</apply_additional_filters>
     <ids_of_additional_filters />
 </EmailFilter>