Exporting email contents to Excel
See also:
Capturing a list of values and saving them to an Excel file
Email Parser can automatically save the data captured from your emails directly into an Excel file. Each time an email is processed, a new row is added to the spreadsheet with the fields you specify. If the Excel file does not exist yet, Email Parser will create a blank one for you automatically.
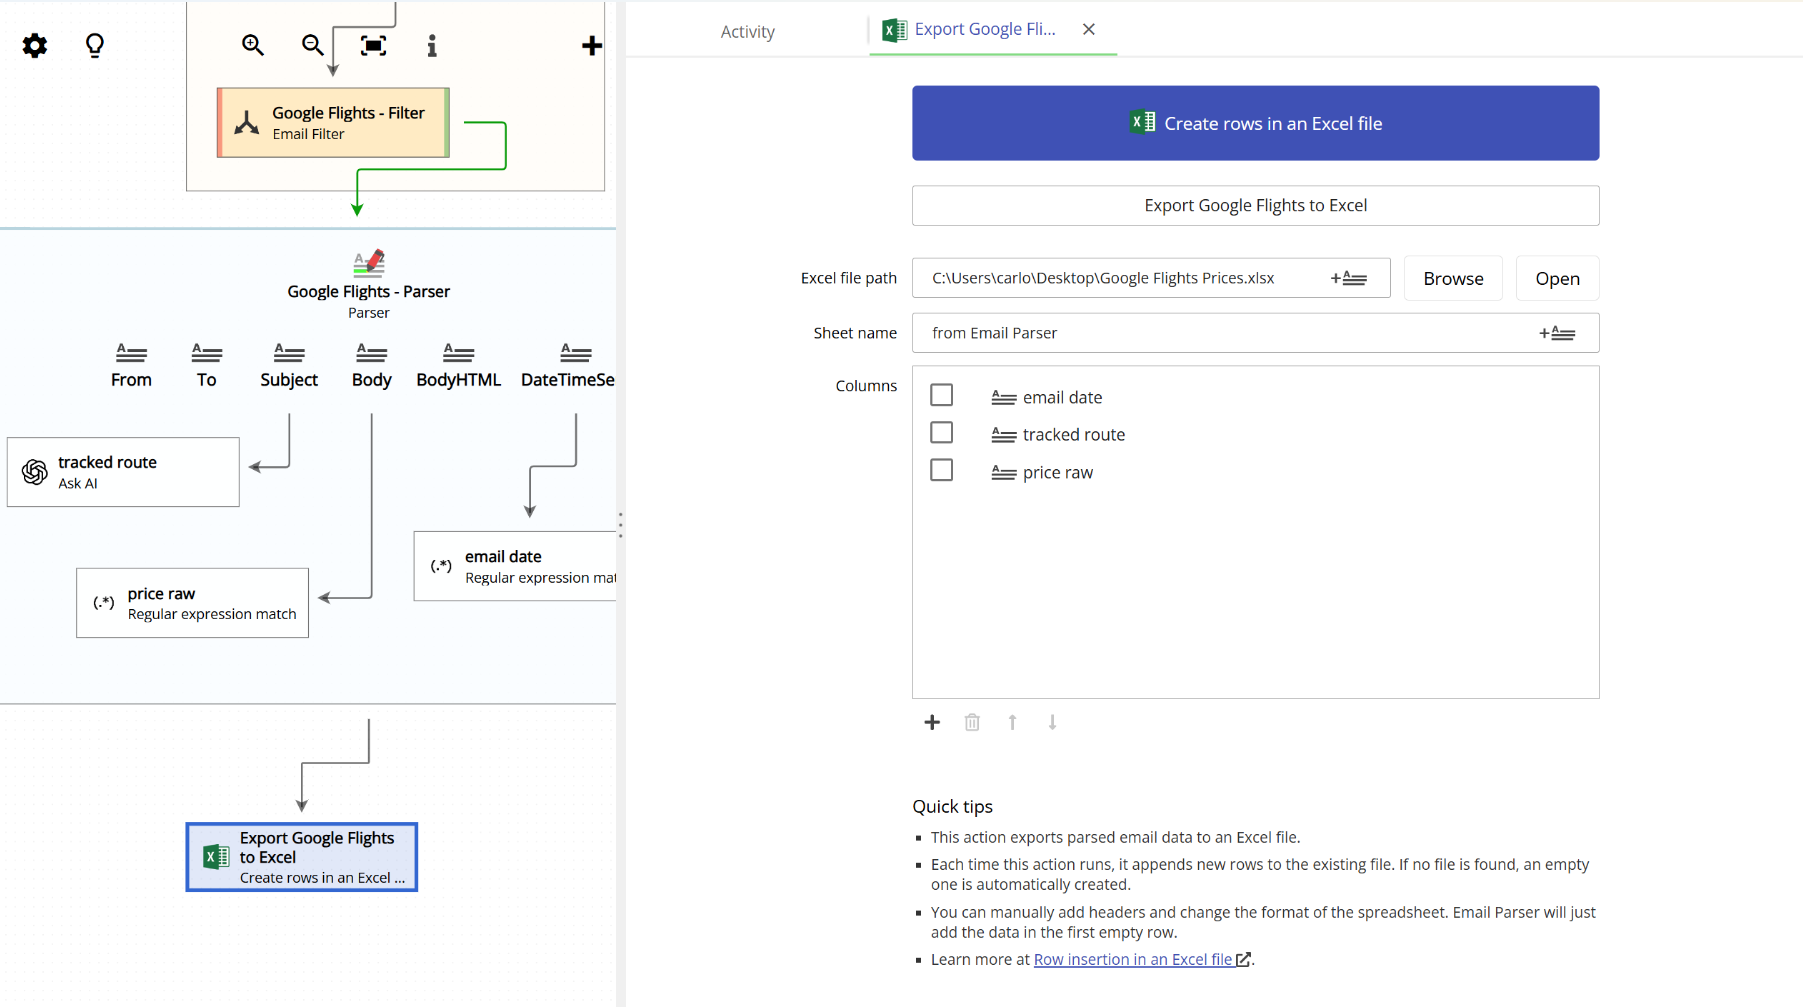
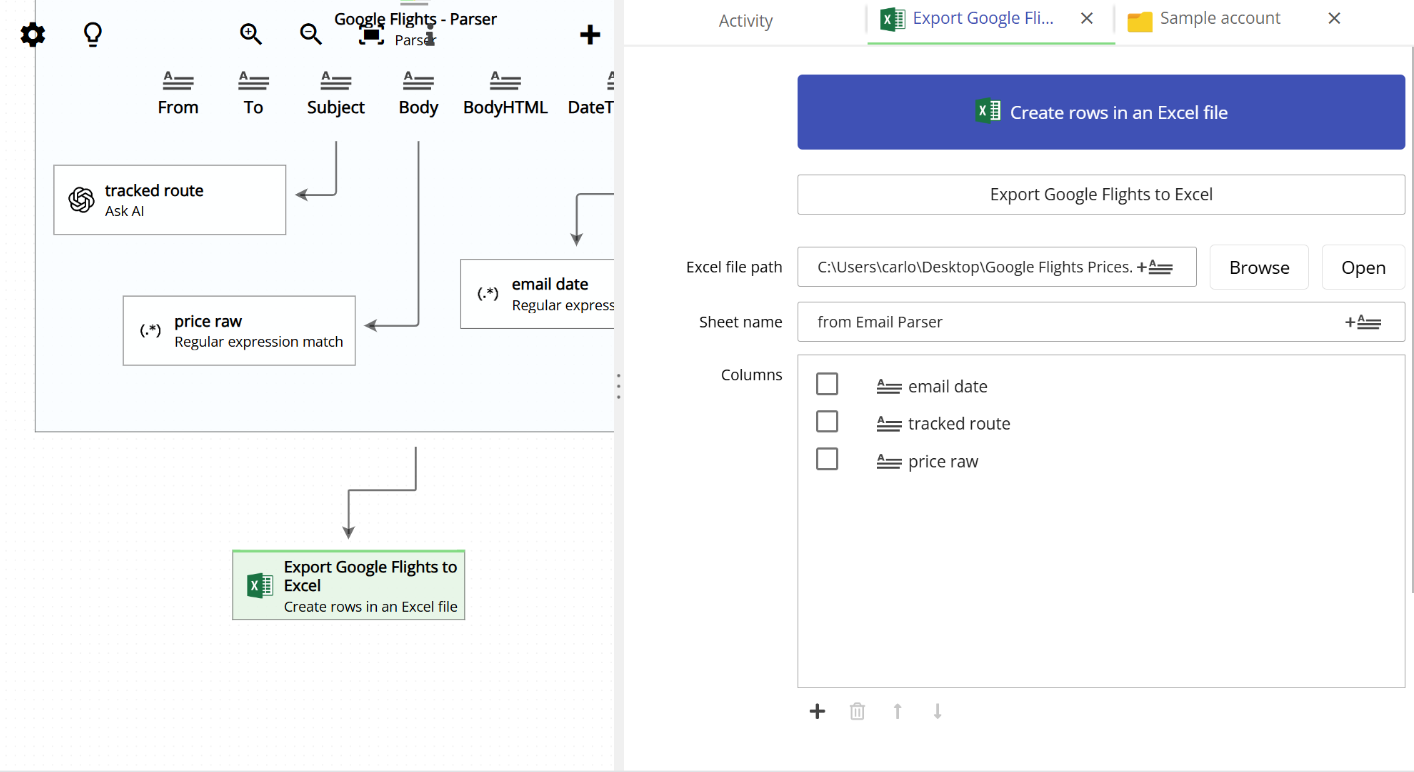
To set this up, you create an action of type Create rows in an Excel file. In the configuration you specify the Excel file path (on the Windows app) or the Excel file name (on the web app), the sheet name (which defaults to from Email Parser), and the columns you want to populate. Columns are added one by one using the + button, and each column is mapped to a captured field from the email.
Windows app vs. web app
The behavior is slightly different depending on which version of Email Parser you are using:
- Windows app: The Excel file is saved directly to your hard drive. You enter the full file path (for example, C:\Users\YourName\Documents\orders.xlsx).
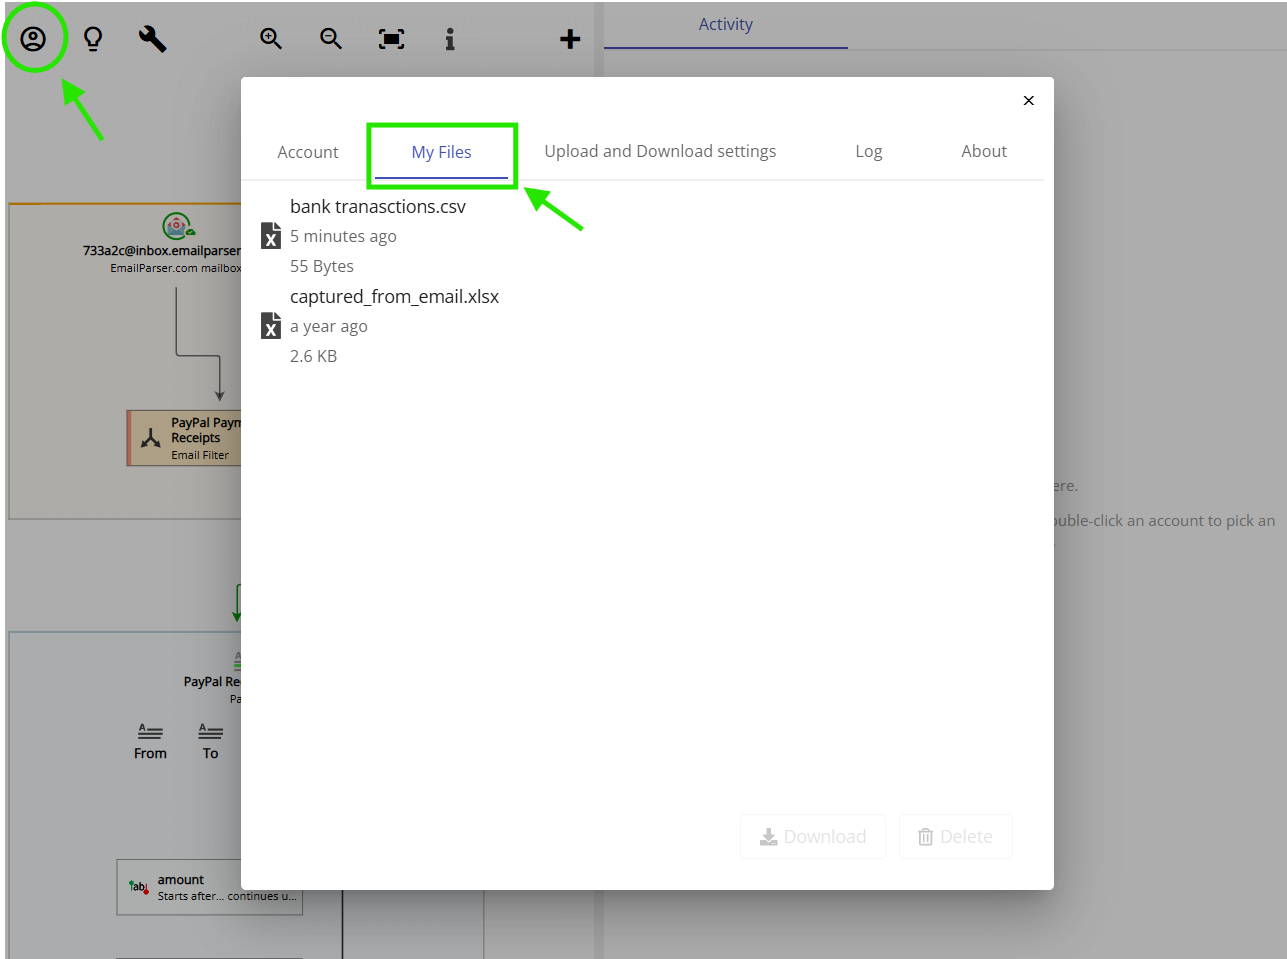
- Web app: Because the web app has no access to your local hard drive, the Excel file is saved to a special cloud storage area inside Email Parser called My Files. You only need to enter the file name (for example, orders.xlsx). To access your files, click the account icon at the top left of the web app and then select the My Files tab.
Seeing it in action
The animation below shows the full process from start to finish. We manually select an existing email and click the Process email button. This triggers the workflow, the email is processed, all the data is parsed, and the result is saved to Excel as a new row.
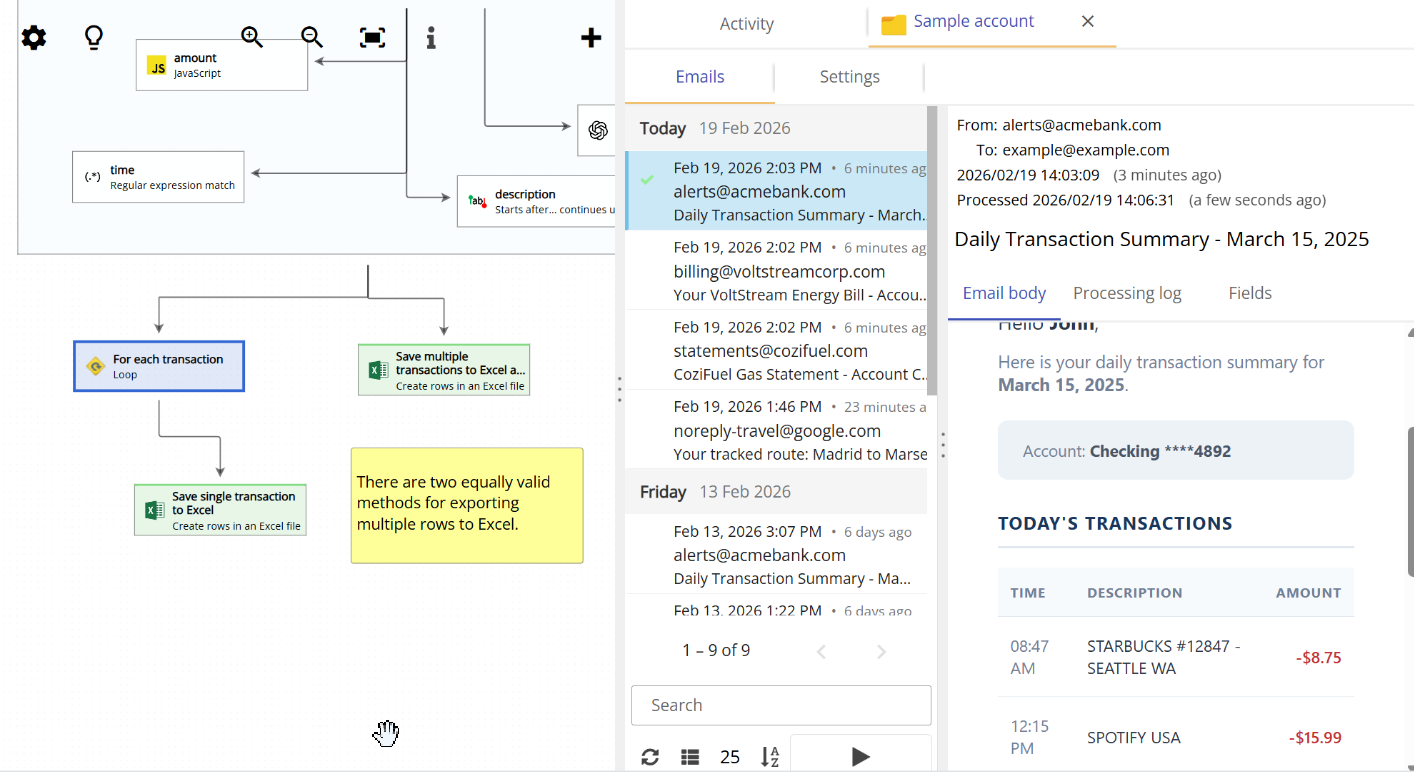
How to save multiple rows to Excel
Sometimes a single email contains repeated information that should be spread across multiple rows in your spreadsheet. For example, an order confirmation email might list several items, and you want each item to be saved as its own row. Email Parser supports this scenario in two different ways.
Simple method: The easiest approach is to just add the captured fields as columns in the Excel action, the same way you would for a single-row scenario. If a captured field contains multiple values (for example, a list of items), Email Parser will automatically detect this and arrange them as separate rows for you. This requires no extra configuration and works well in most cases.
Advanced method using a Loop action: If you need more precise control over how rows are grouped, you can use a Loop action. In the Loop action you define which set of fields represents a single row. You then attach the Excel action to the Loop, so that for each iteration of the loop, one row is written to the spreadsheet. This approach gives you full control when the email data has a more complex structure.
The animation below demonstrates both approaches:
Common issues and questions
Can I add a header row or format the Excel file?
Yes. Email Parser simply adds rows on the first empty row it finds and does not care about the formatting of the existing rows. This means you can freely add a header row, change cell sizes, apply fonts, use colors, or any other formatting you like. Email Parser will leave it untouched and just append new data below.
I get the error: “Error. The process cannot access the file ‘excel_file.xlsx’ because it is being used by another process.”
This happens because the Excel application locks the file to prevent other programs from writing to it while it has the file open. To fix this, close the Excel file before processing an email in Email Parser. Once the file is closed, Email Parser will be able to write to it without any issues.