How to save email attachments automatically
Email Parser can automatically save the attachments of incoming emails without any manual intervention. Once configured, every time an email with attachments arrives, the files will be saved to a folder on your computer (Windows version) or to a special area called “My Files” (web version). This is very useful for organizing documents, invoices, reports, or any other files that are regularly received by email.
Creating a “Save attachments” action
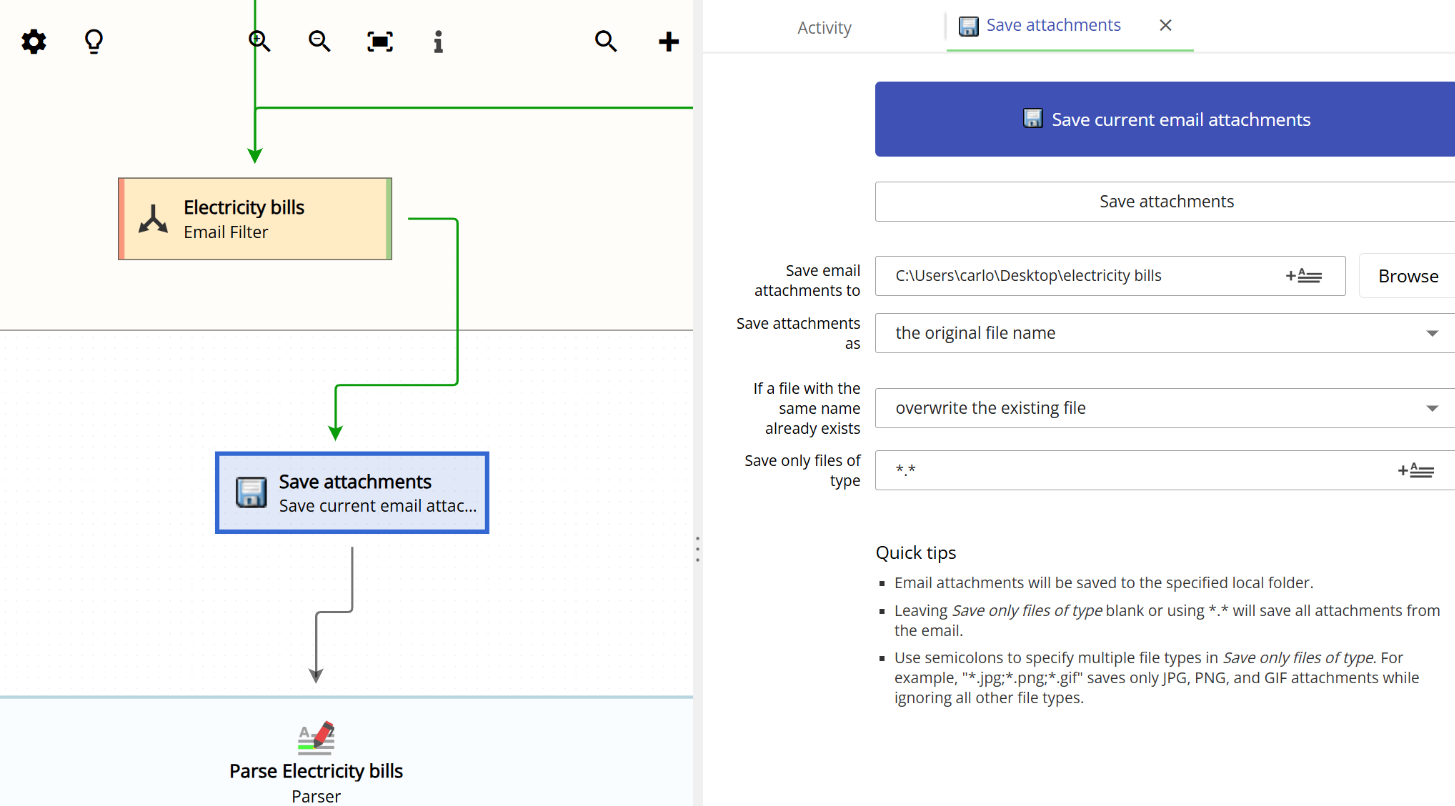
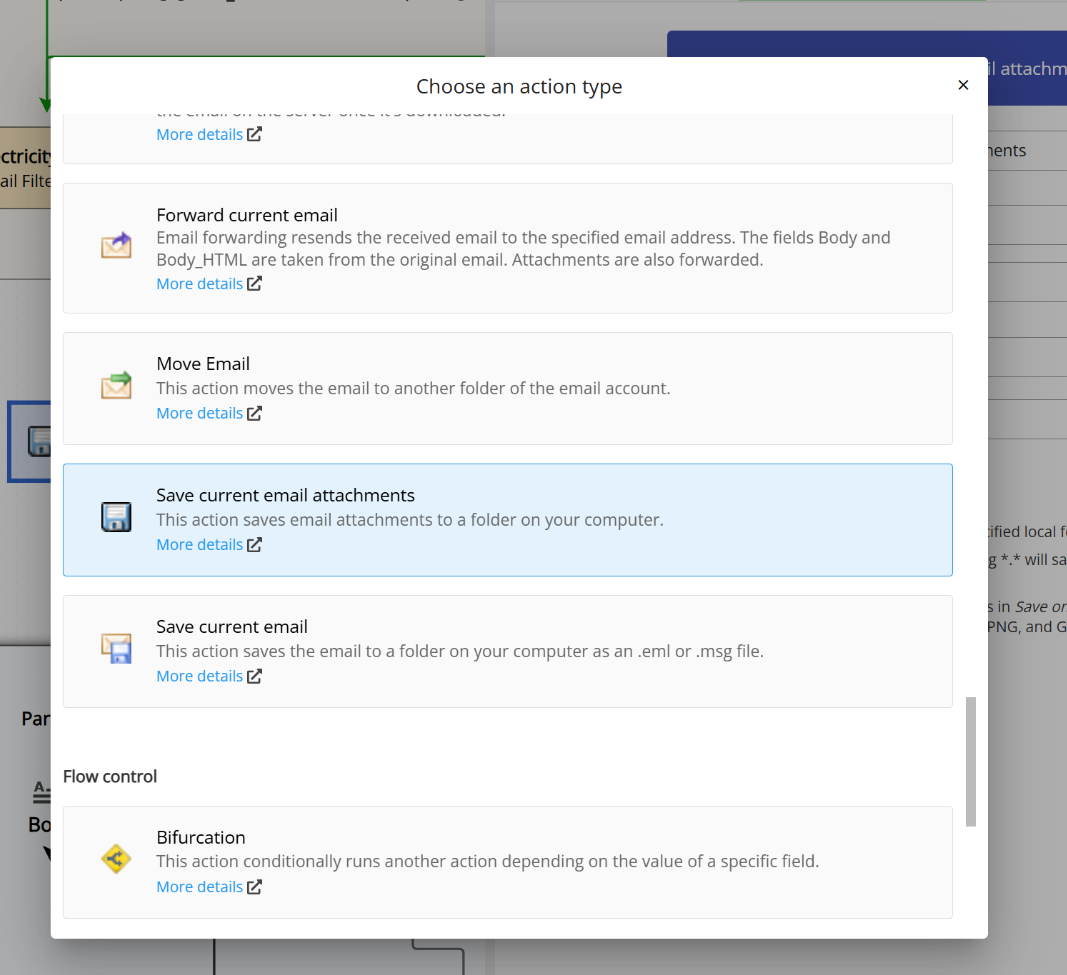
To set up automatic attachment saving, you need to create an action of type “Save current email attachments” in your workflow. When you add a new action, you will see this option in the list of available action types, as shown below:
Once you select this action type, you will be able to configure the destination folder and how the attachment files are named, among other options.
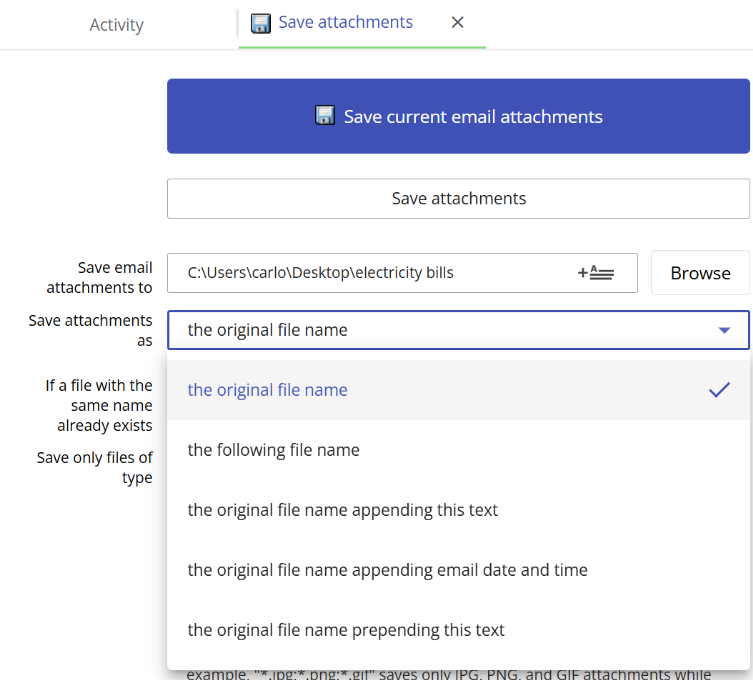
Saving attachments in the Windows version
In the Windows version of Email Parser, attachments are saved directly to a local folder on your computer. You can choose any folder you want by typing the path or by clicking the “Browse” button.
Saving attachments in the web version
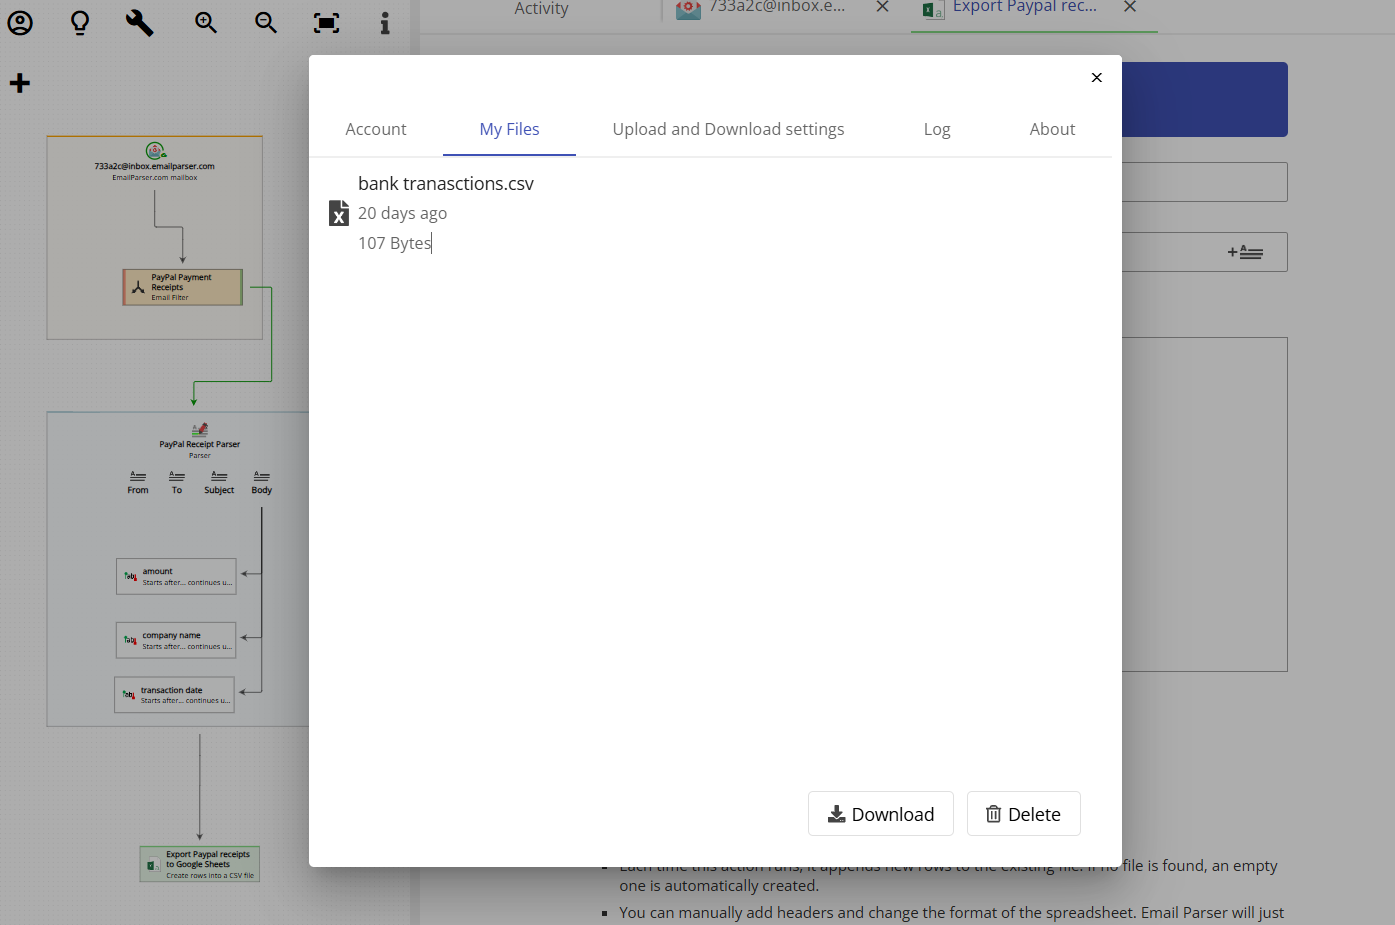
The web version of Email Parser works slightly differently. Since a web application cannot save files directly to your computer, the attachments are saved to a special area called “My Files.” You can access this area by clicking on the “Account” button located at the very top left of the page and then selecting the “My Files” tab. From there, you can view and download all the attachments that have been saved automatically.
File naming options
Email Parser provides several options for naming the saved attachment files. This is configured in the “Save attachments as” dropdown, which offers the following choices:
- The original file name: keeps the file name exactly as it was in the email attachment.
- The following file name: lets you specify a custom file name for the saved attachment.
- The original file name appending this text: saves the file using its original name but adds custom text at the end. For example, an attachment called
report.pdfcould be saved asreport_reviewed.pdf. - The original file name appending email date and time: saves the file using its original name but adds the date and time the email was received. This is very useful for avoiding duplicate file names when you receive attachments with the same name over time.
- The original file name prepending this text: saves the file using its original name but adds custom text at the beginning. For example, an attachment called
invoice.pdfcould be saved asacme_invoice.pdf.
Additional settings
There are a couple of additional settings you can configure:
- If a file with the same name already exists: controls what happens when a file with the same name is already present in the destination folder. This is useful to prevent accidentally overwriting previously saved attachments.
- Save only files of type: allows you to filter attachments by file type. For example, entering
*.pdfwill save only PDF files, and entering*.jpg;*.png;*.gifwill save only JPG, PNG, and GIF image attachments while ignoring all other file types.